1. Projects
- 1.1 Creating a project
- 1.2 Navigating between projects
- 1.3 Printing/ downloading the project
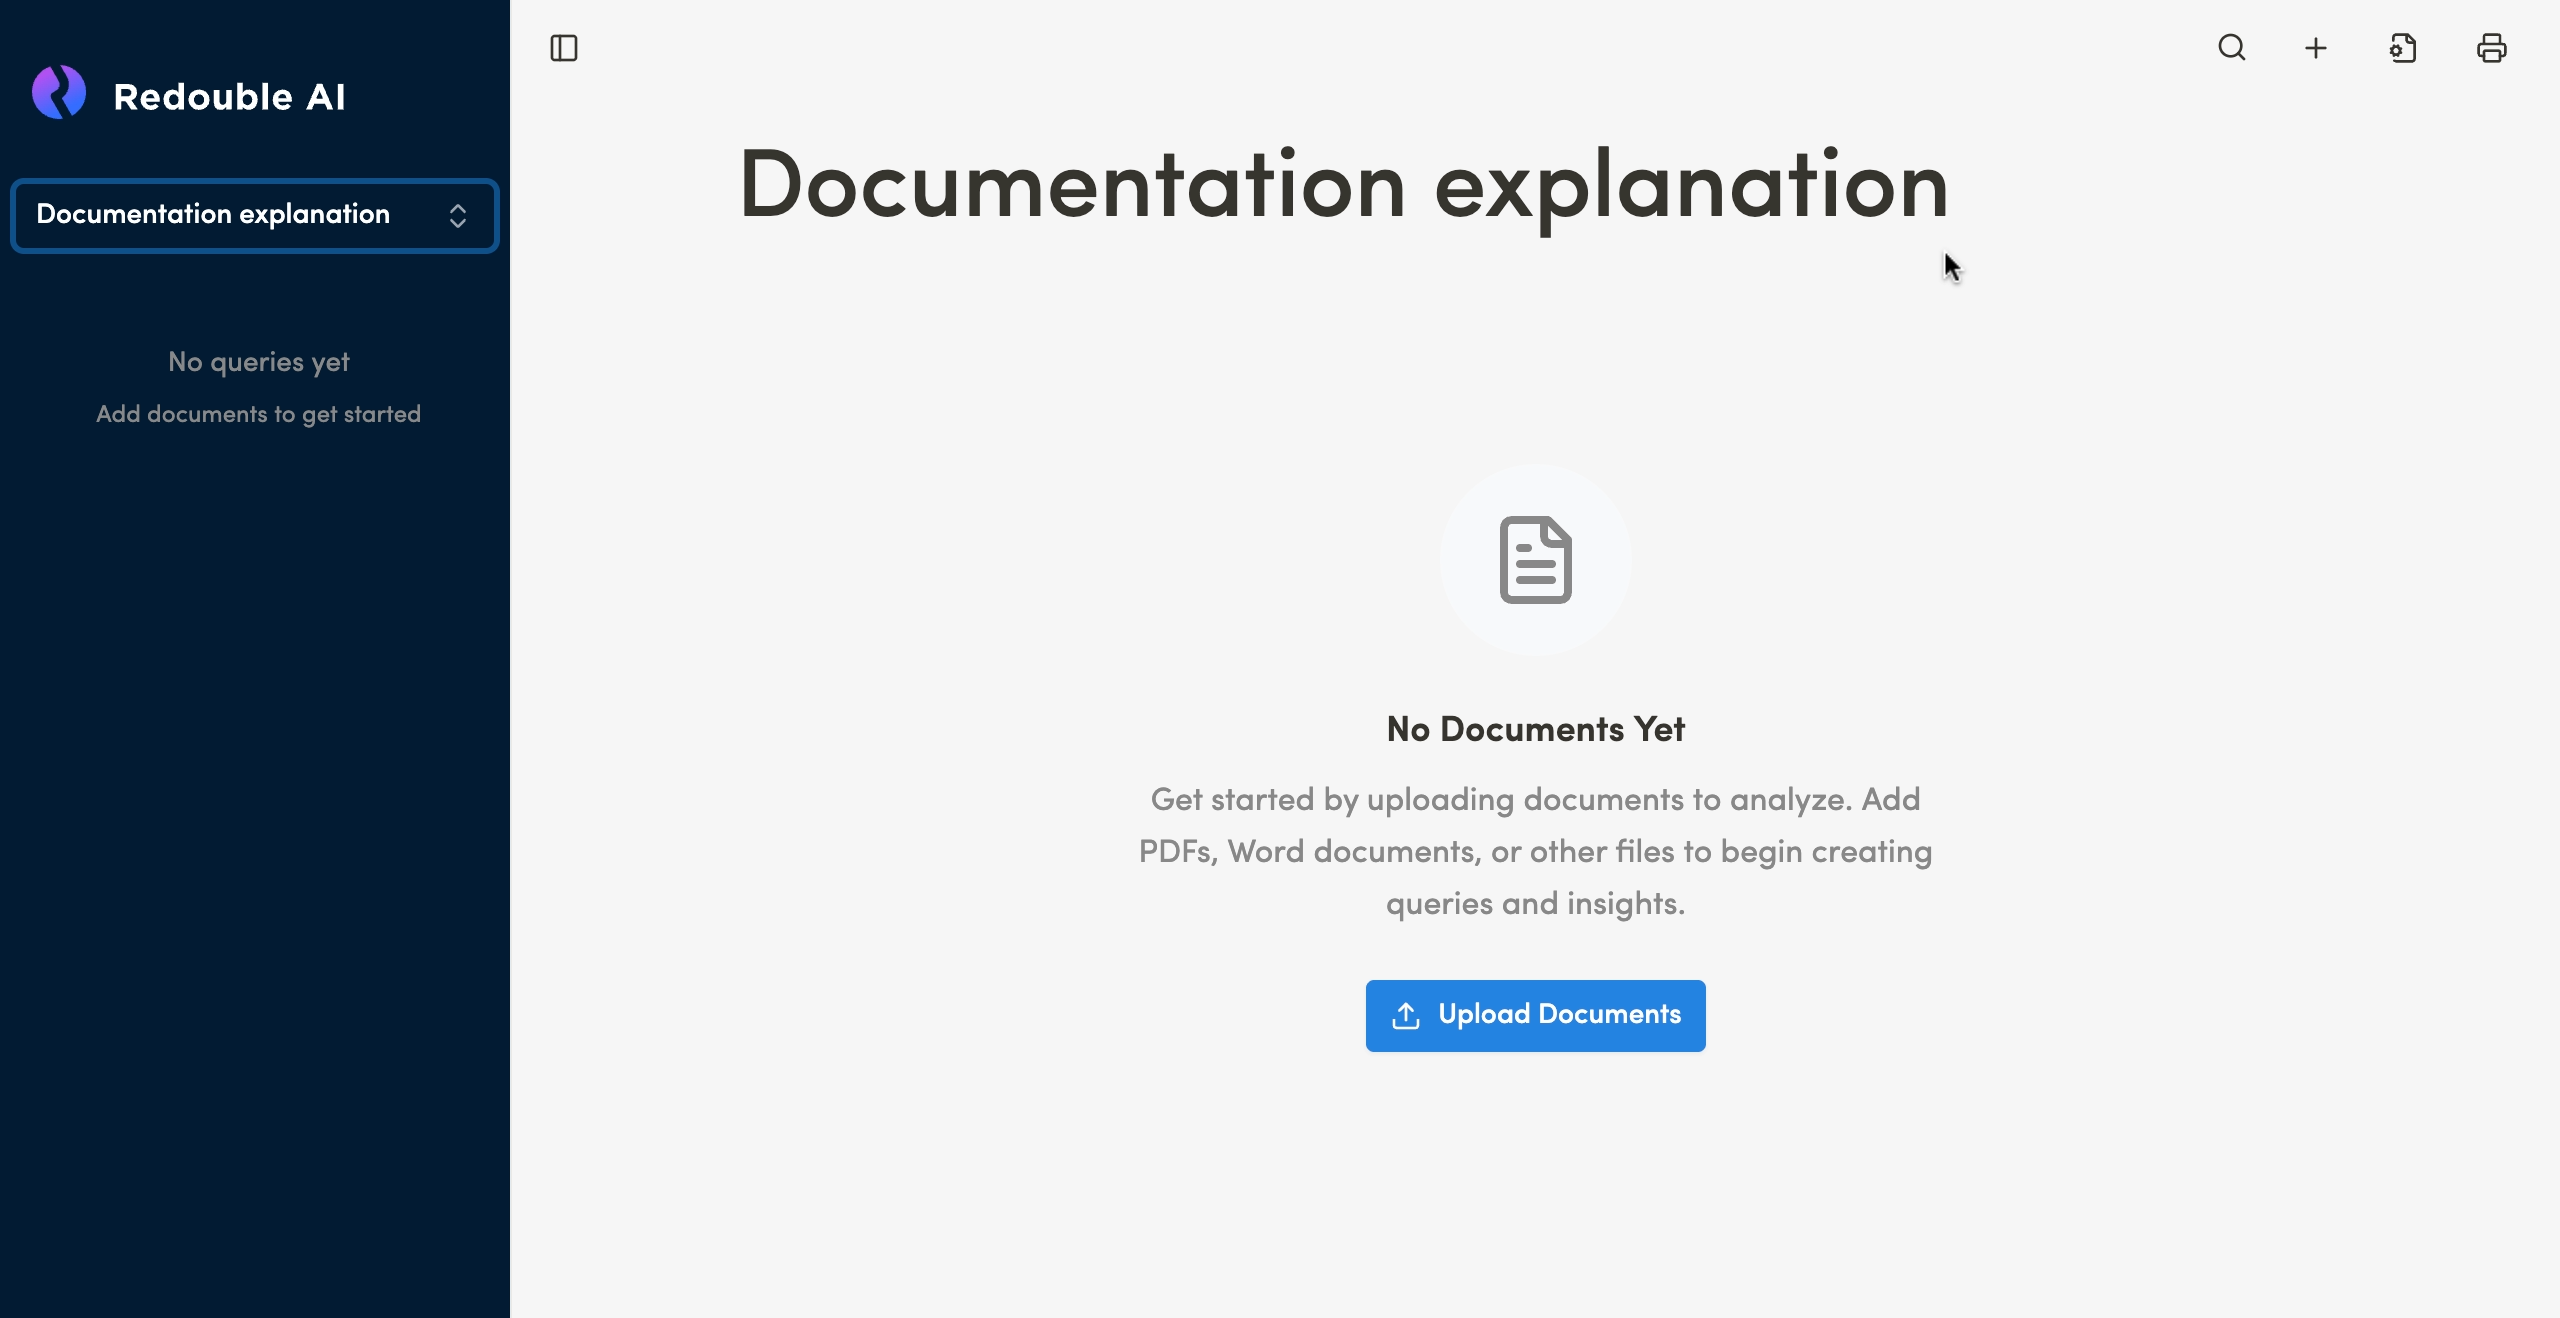
- 1.4 Upload documents to the newly created project
- 1.5 Deleting a project
- 1.6 Copying a project
- 1.7 Sharing a project
1.1 Creating a project
Preconditions:
- You are logged into the Redouble AI system
- You have permissions to create projects
Steps:
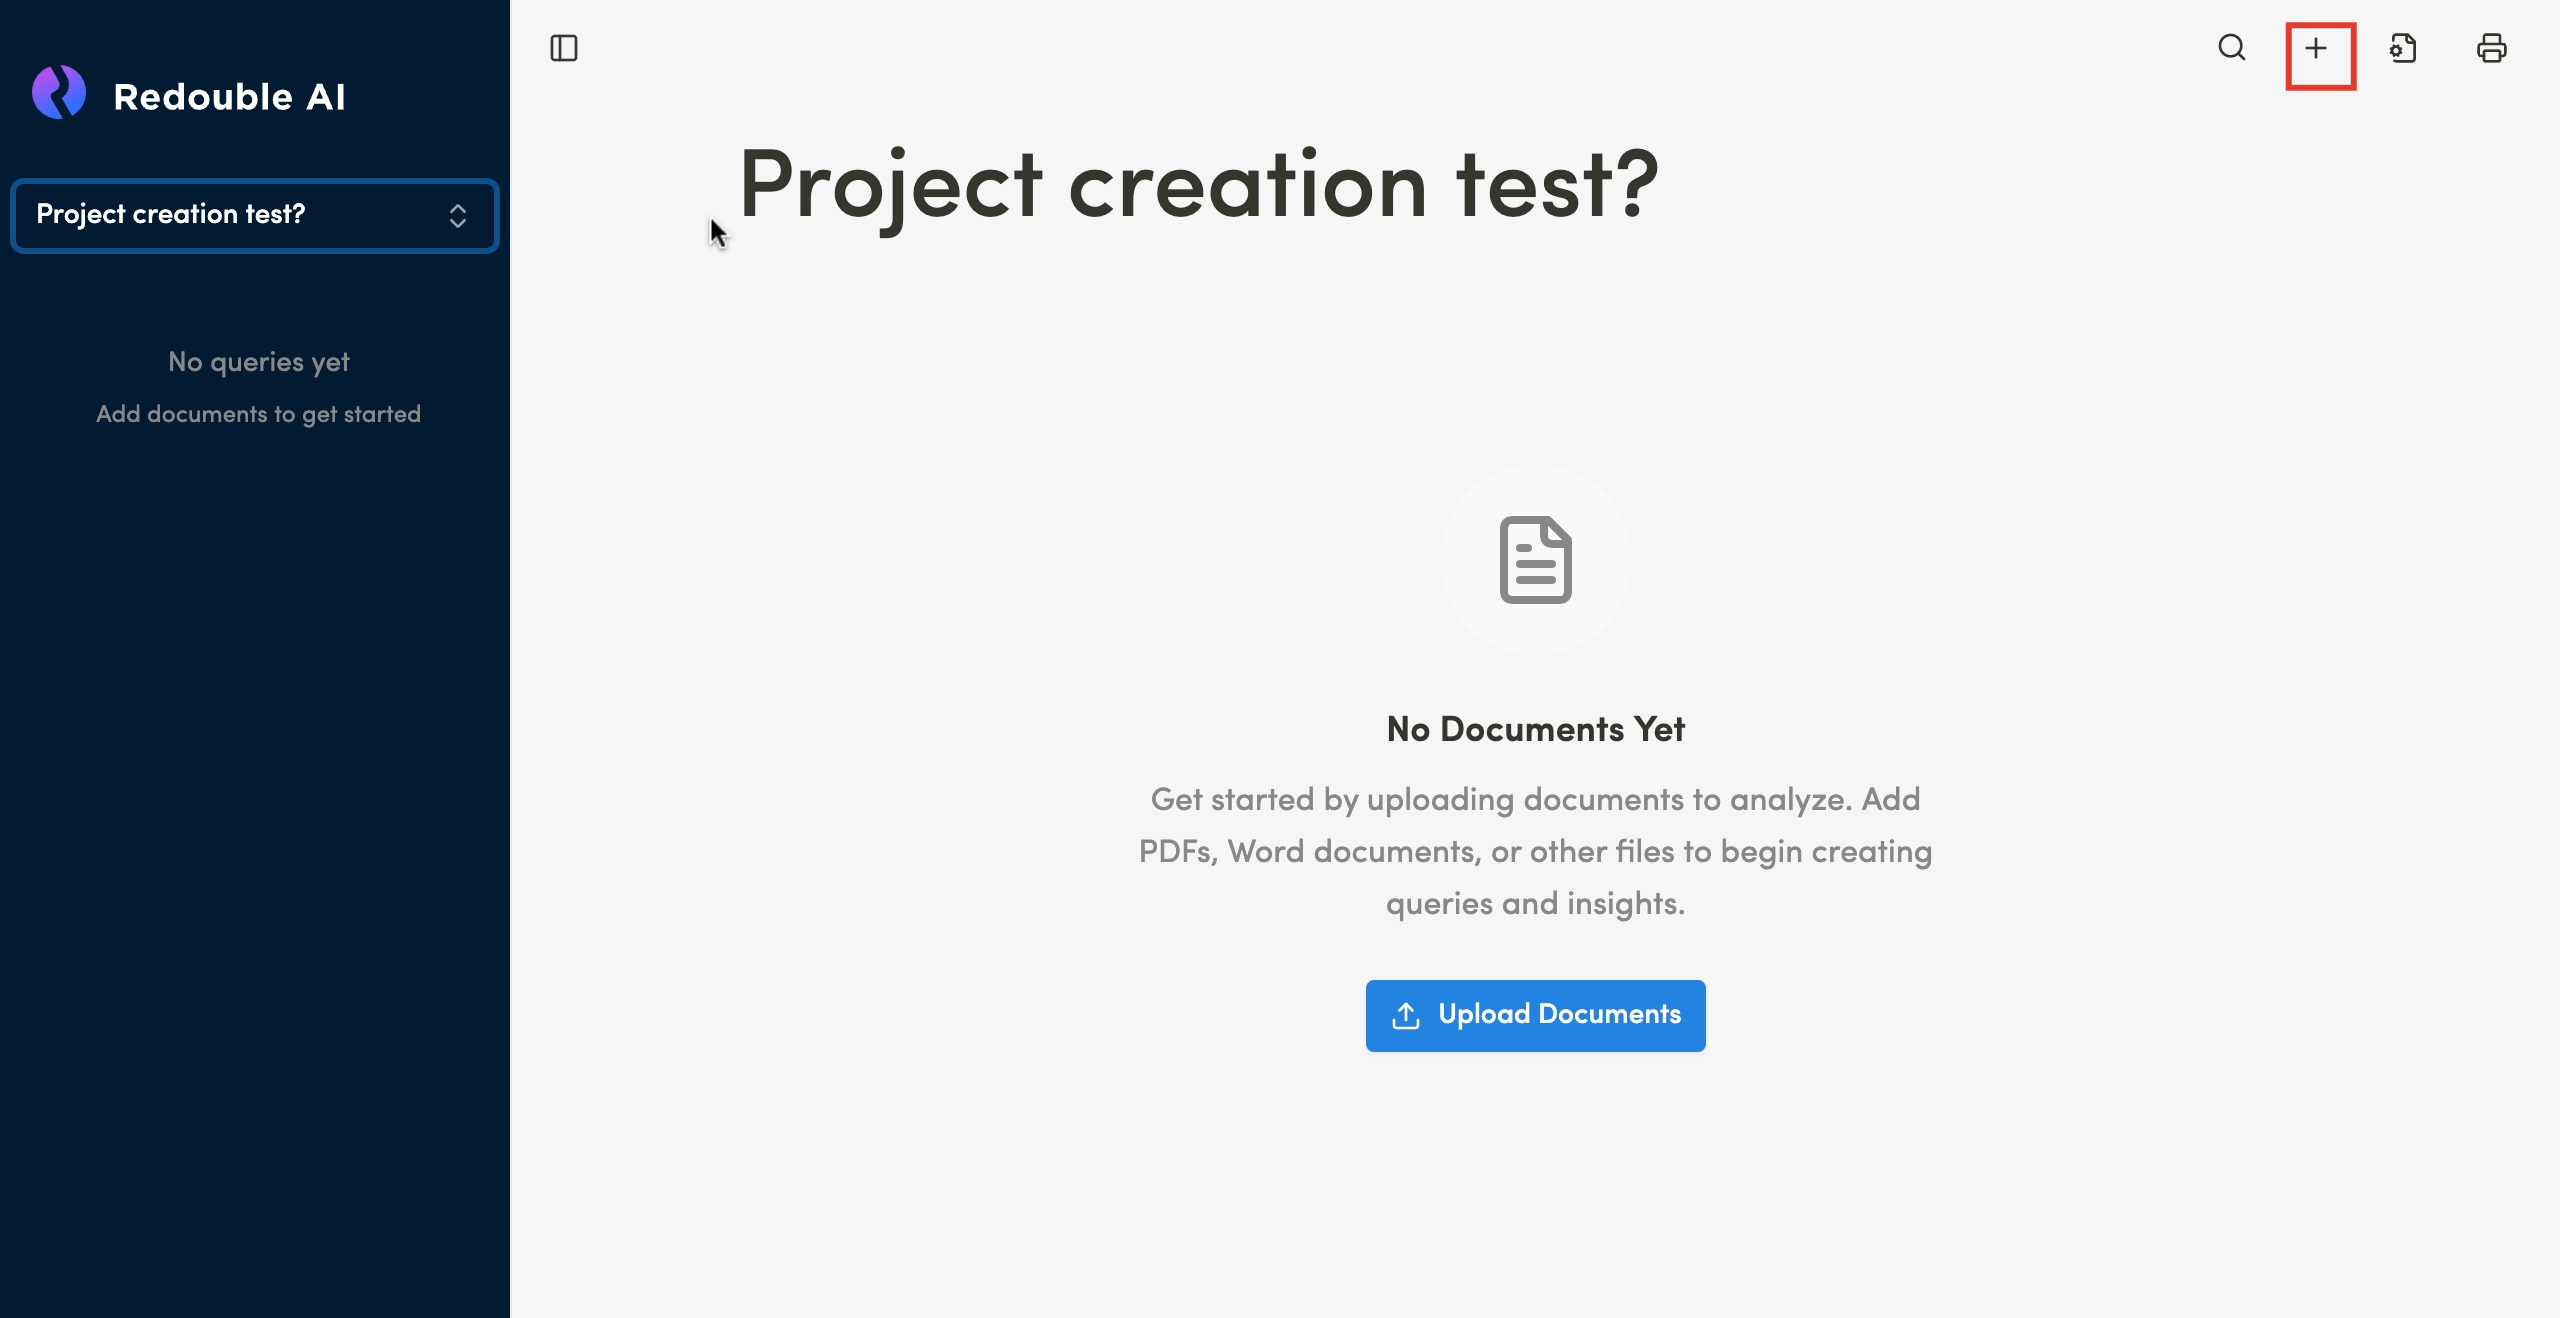
- Click the "+" icon button (New Project) in the top toolbar

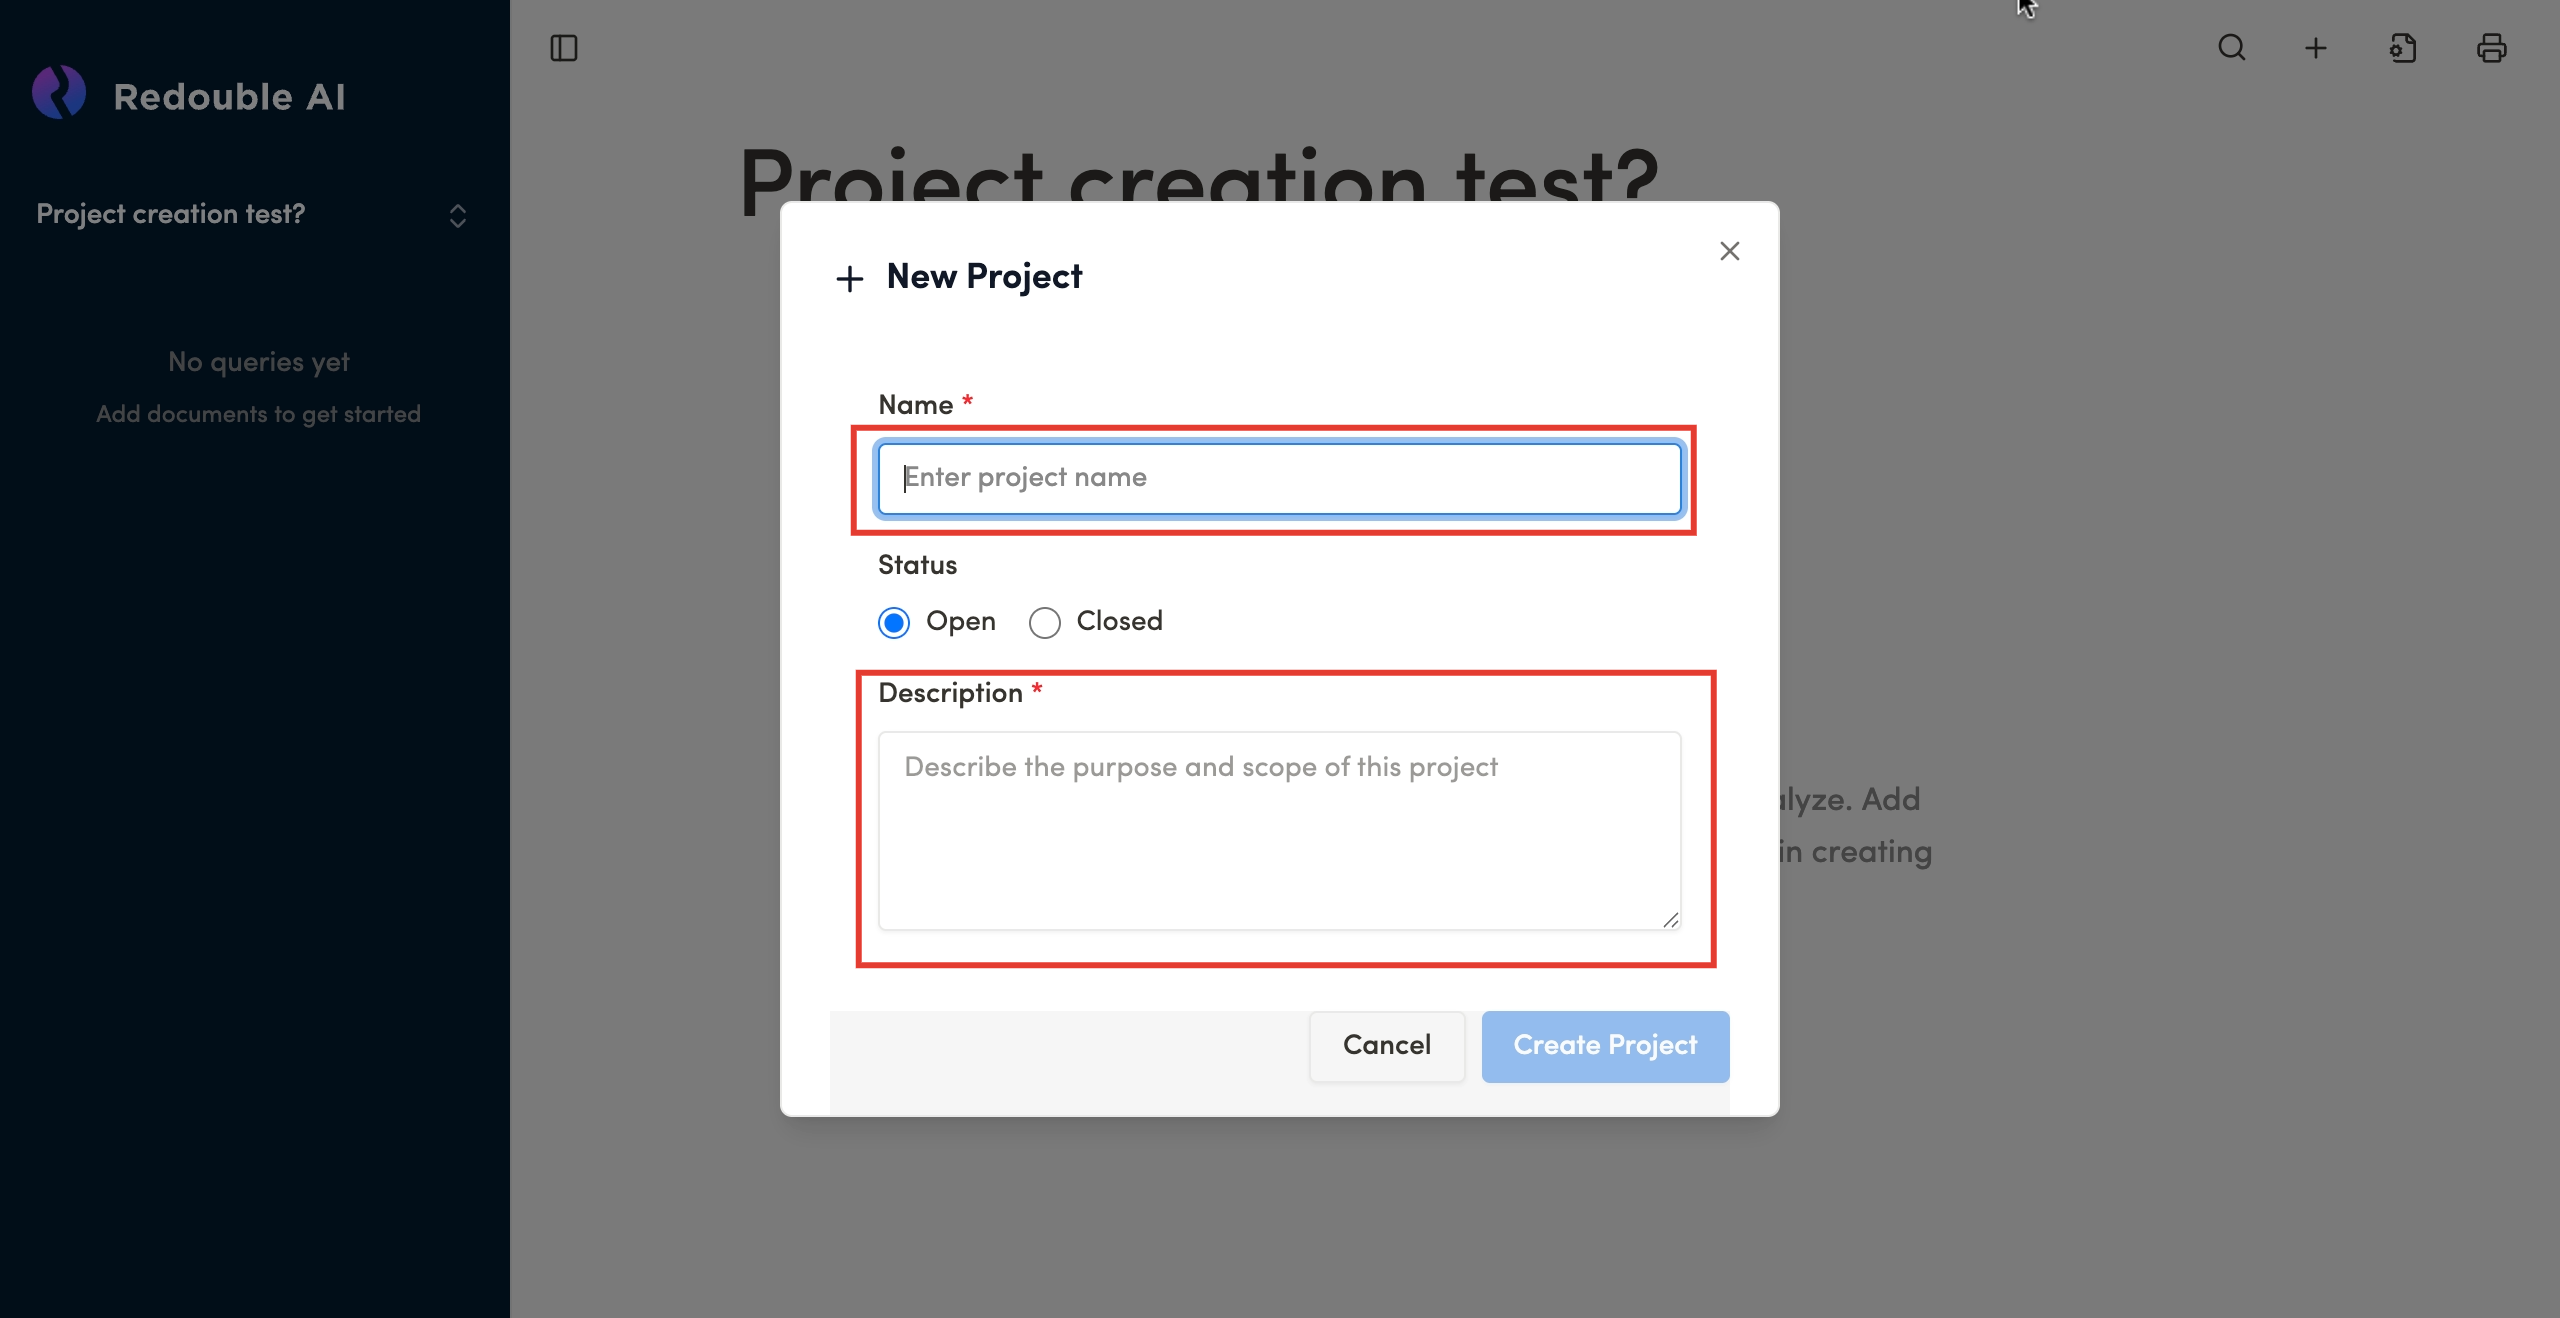
- In the "New Project" dialog window, fill in the required fields:
- Name — enter the project name
- Description — describe the purpose of the project

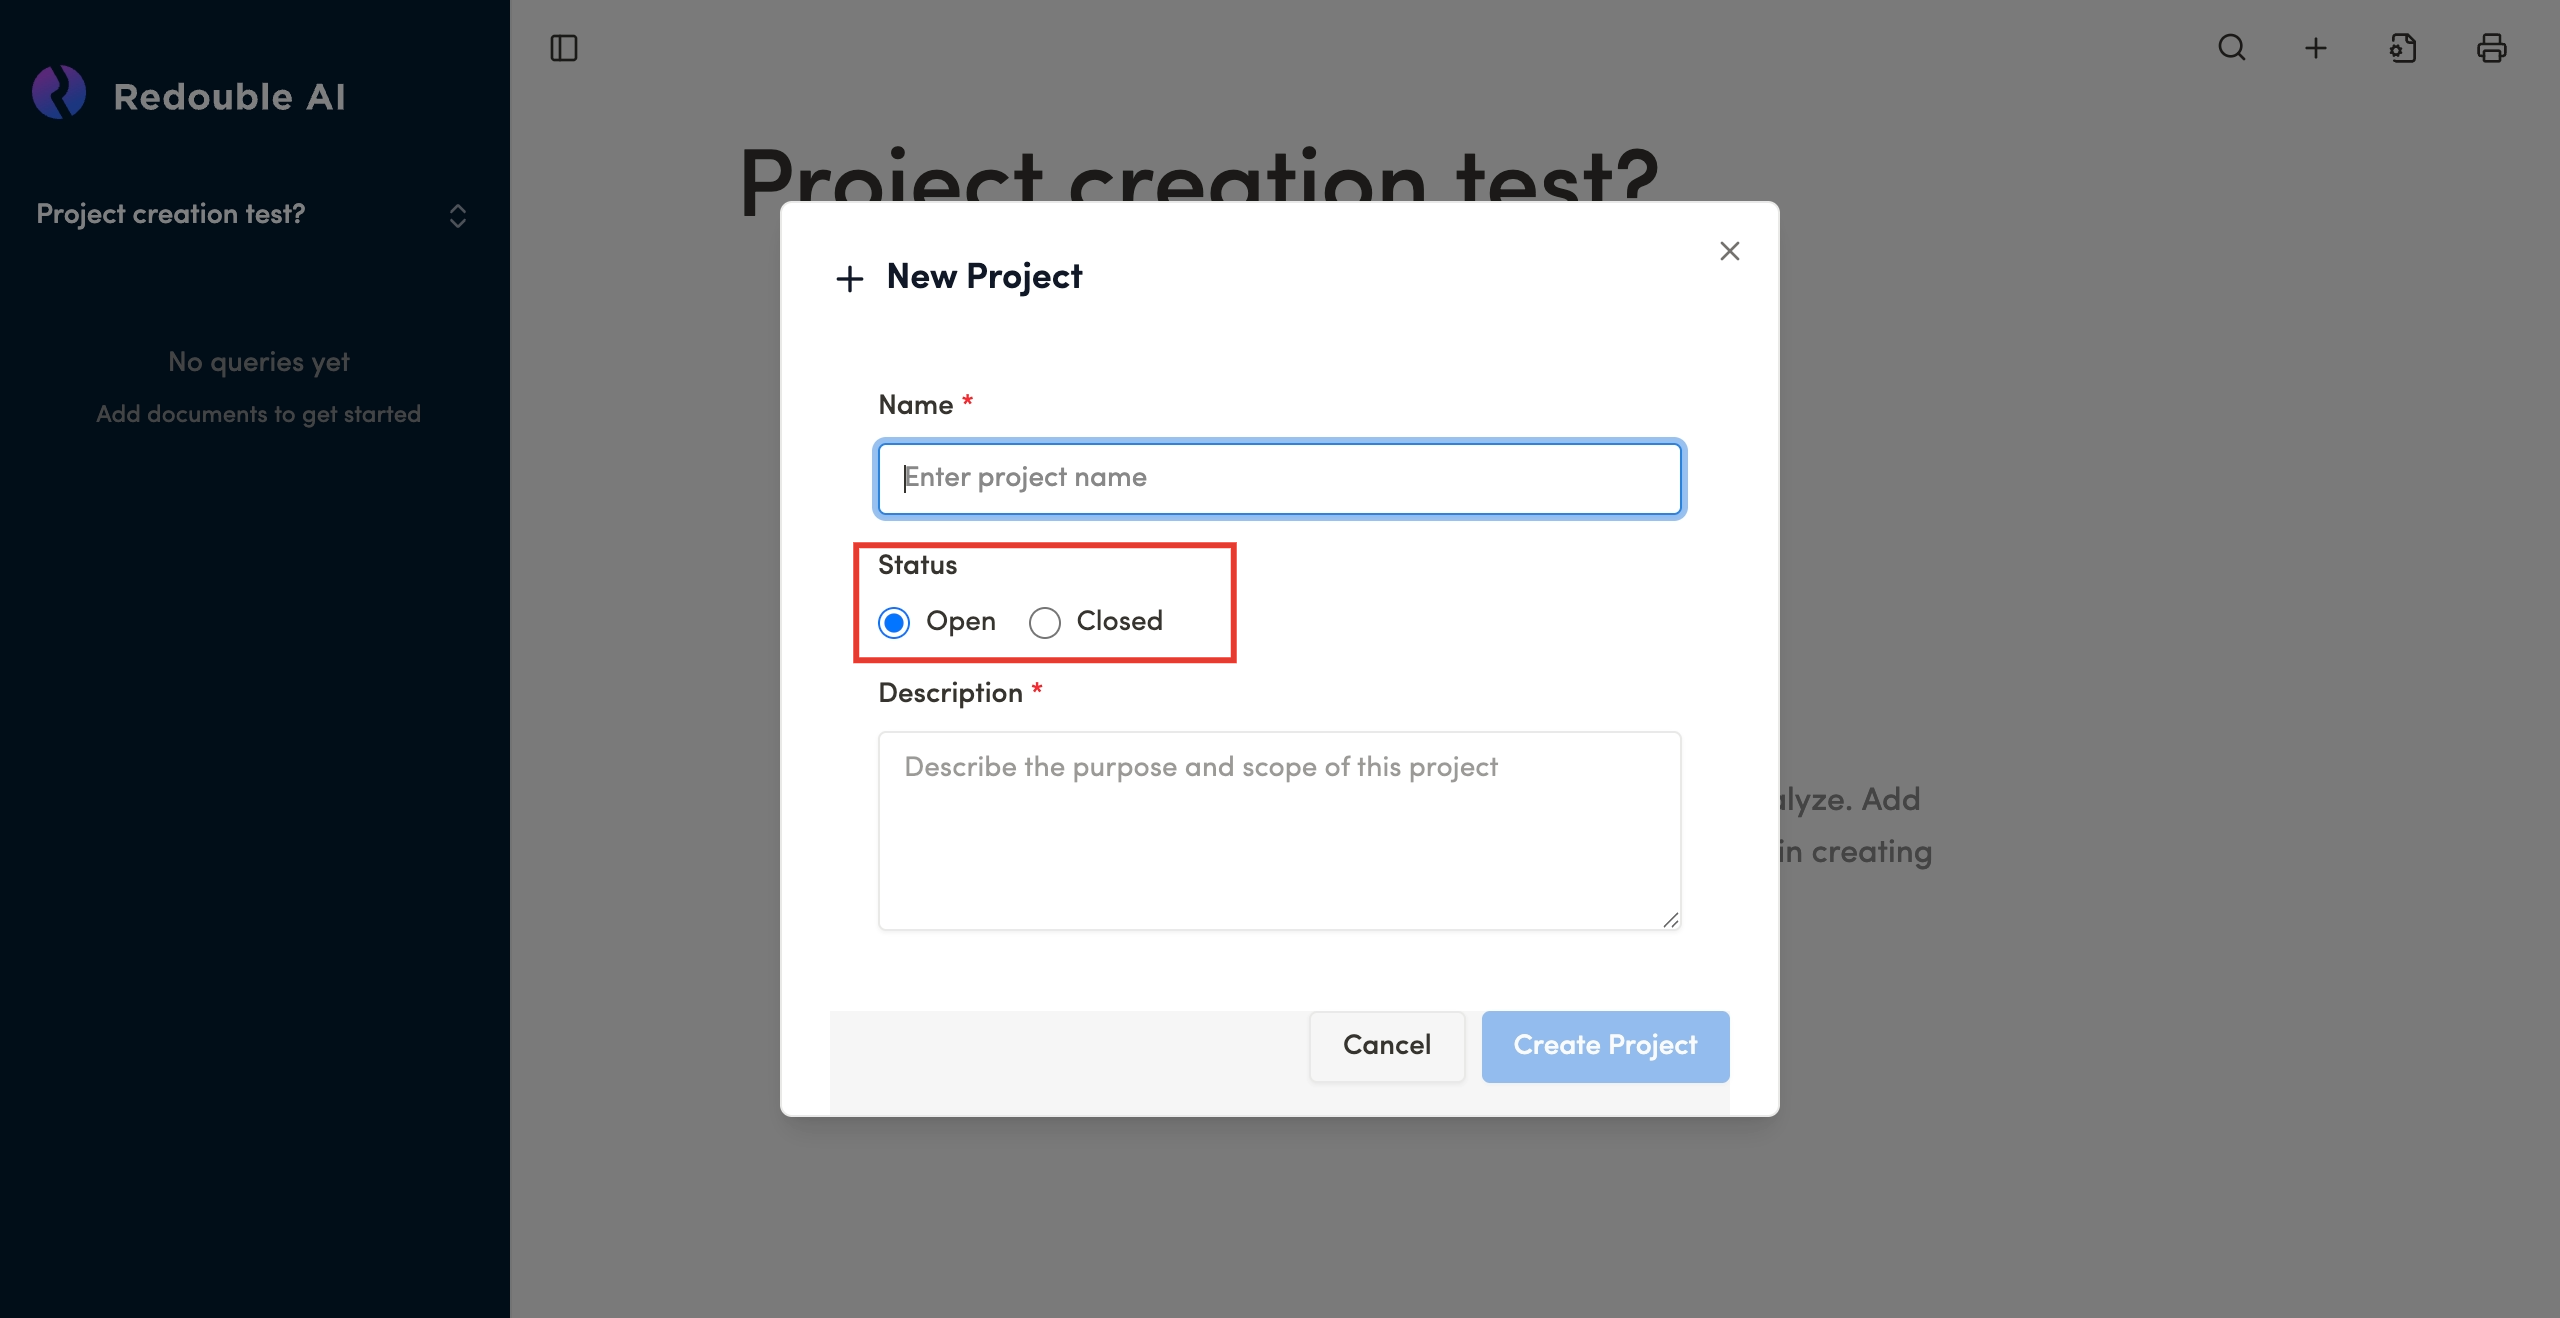
- Select the project status:
- Open (default) — project is active
- Closed — project is completed

- Click the "Create Project" button

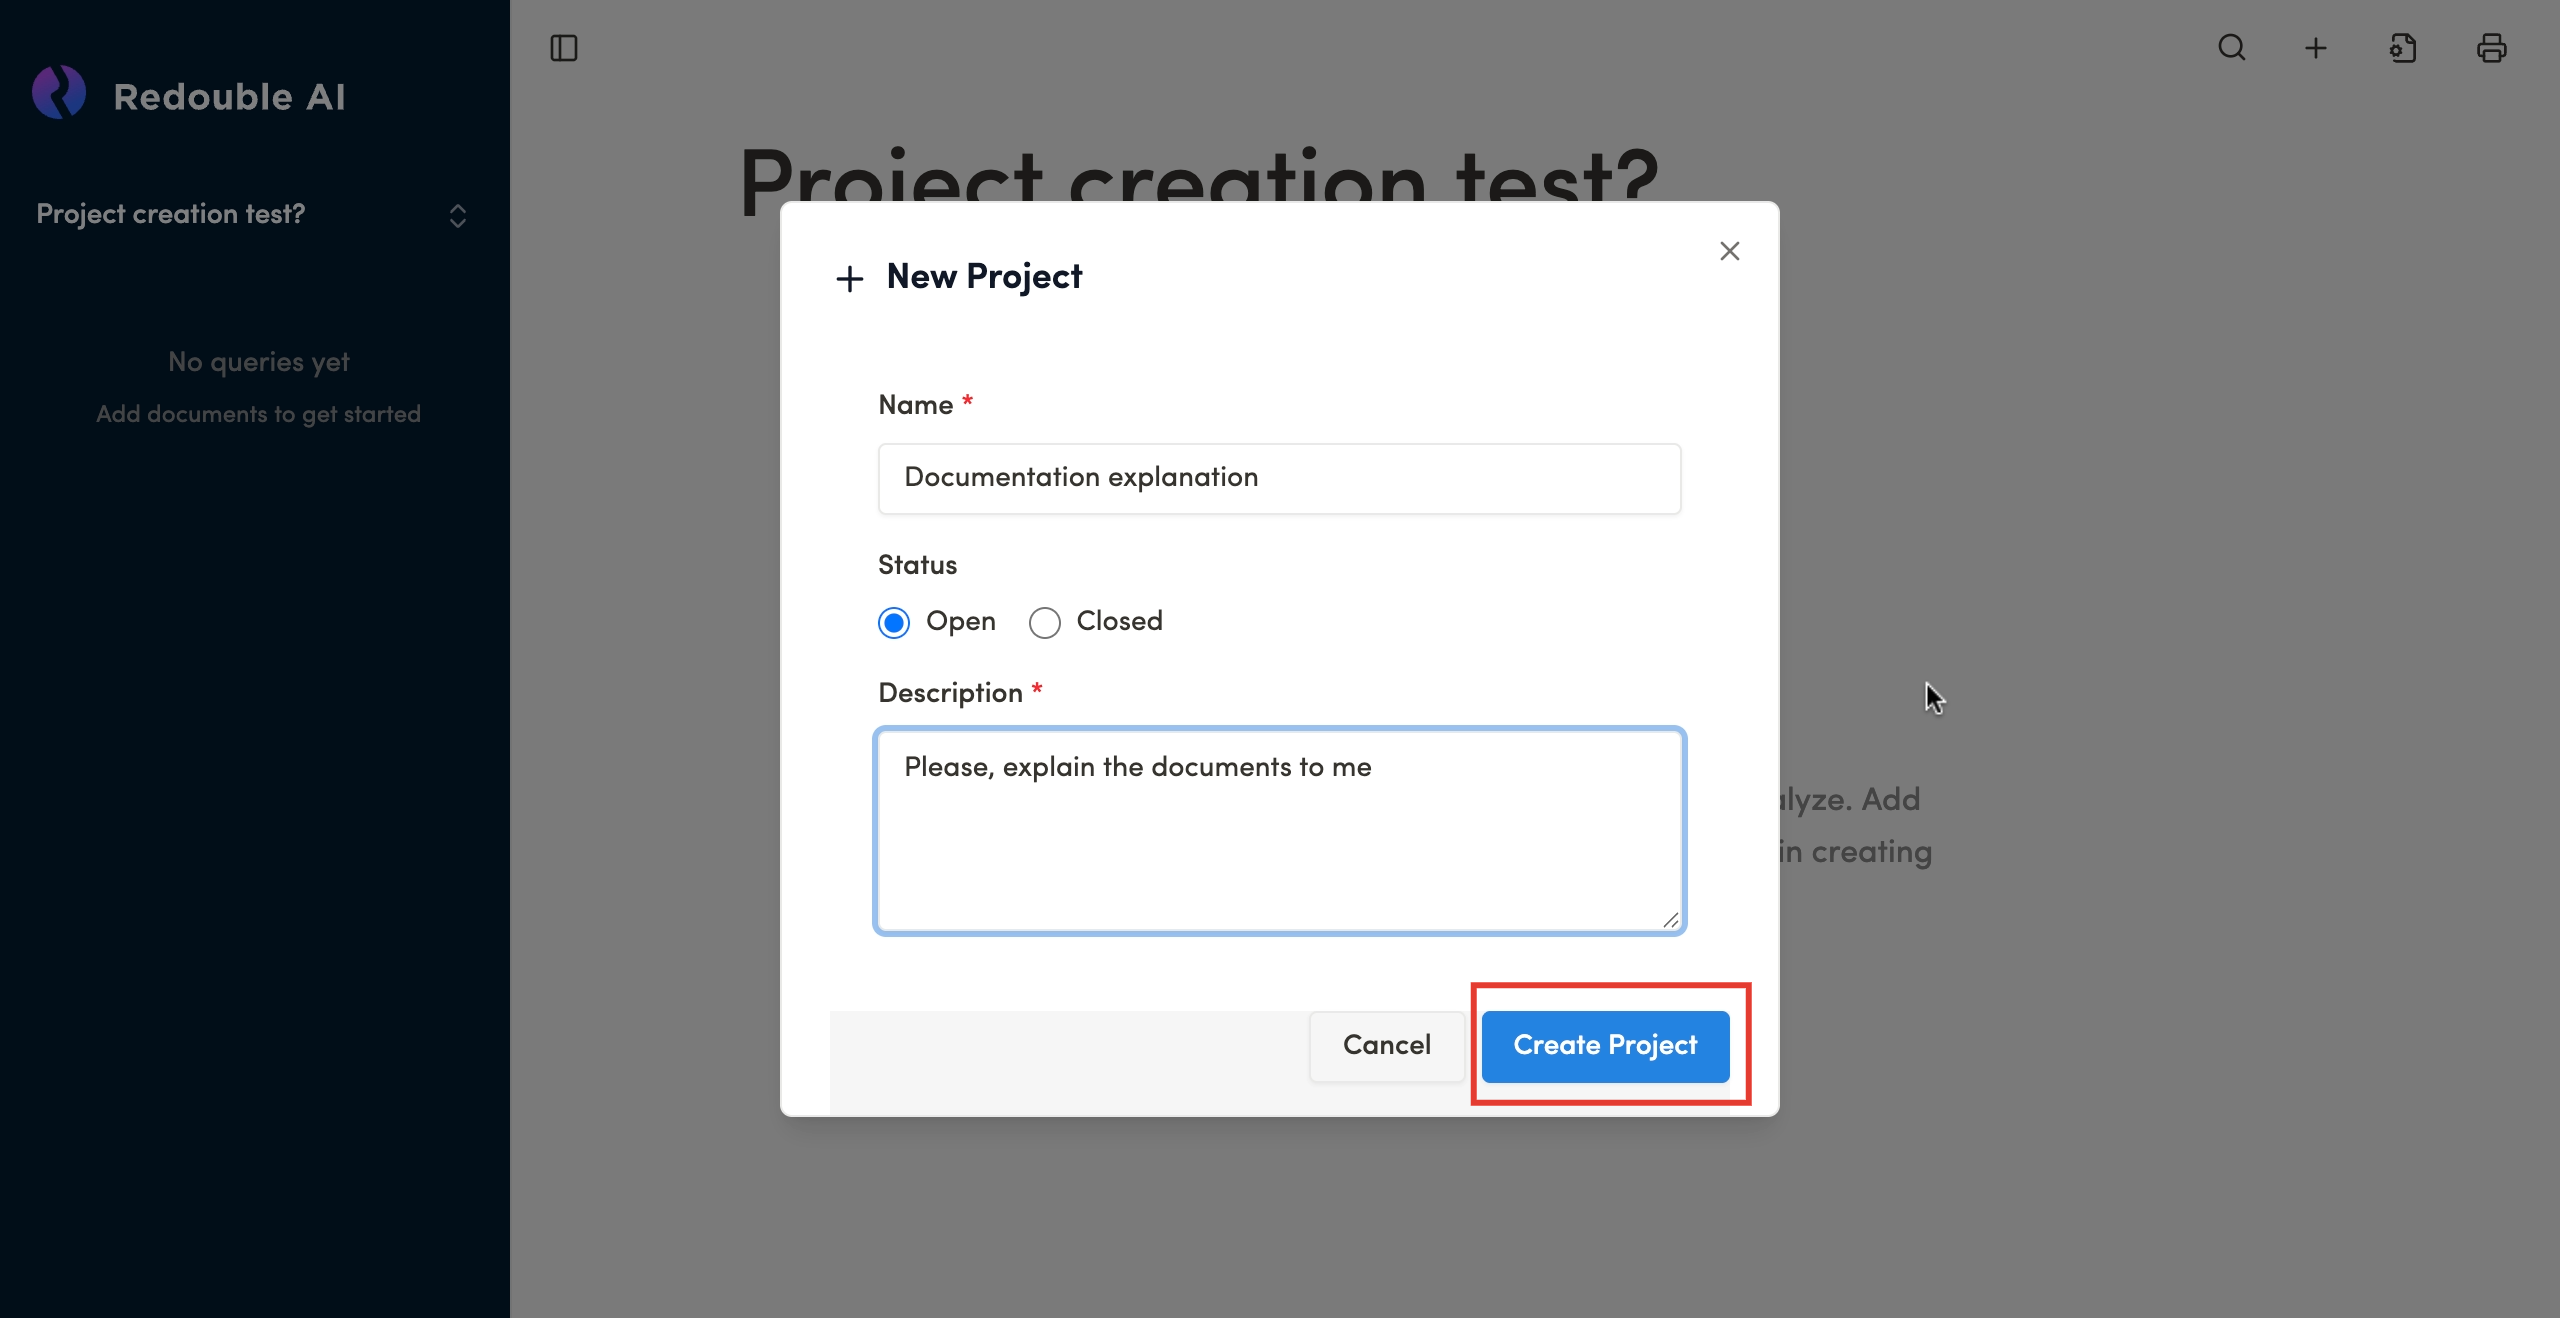
Result: The project is created and automatically opened for work. You will be redirected to the project's main page where you can add documents and create questions for analysis.
1.2 Navigating between projects
Preconditions:
- You are logged into the Redouble AI system
- At least one project exists in the system
Steps:
-
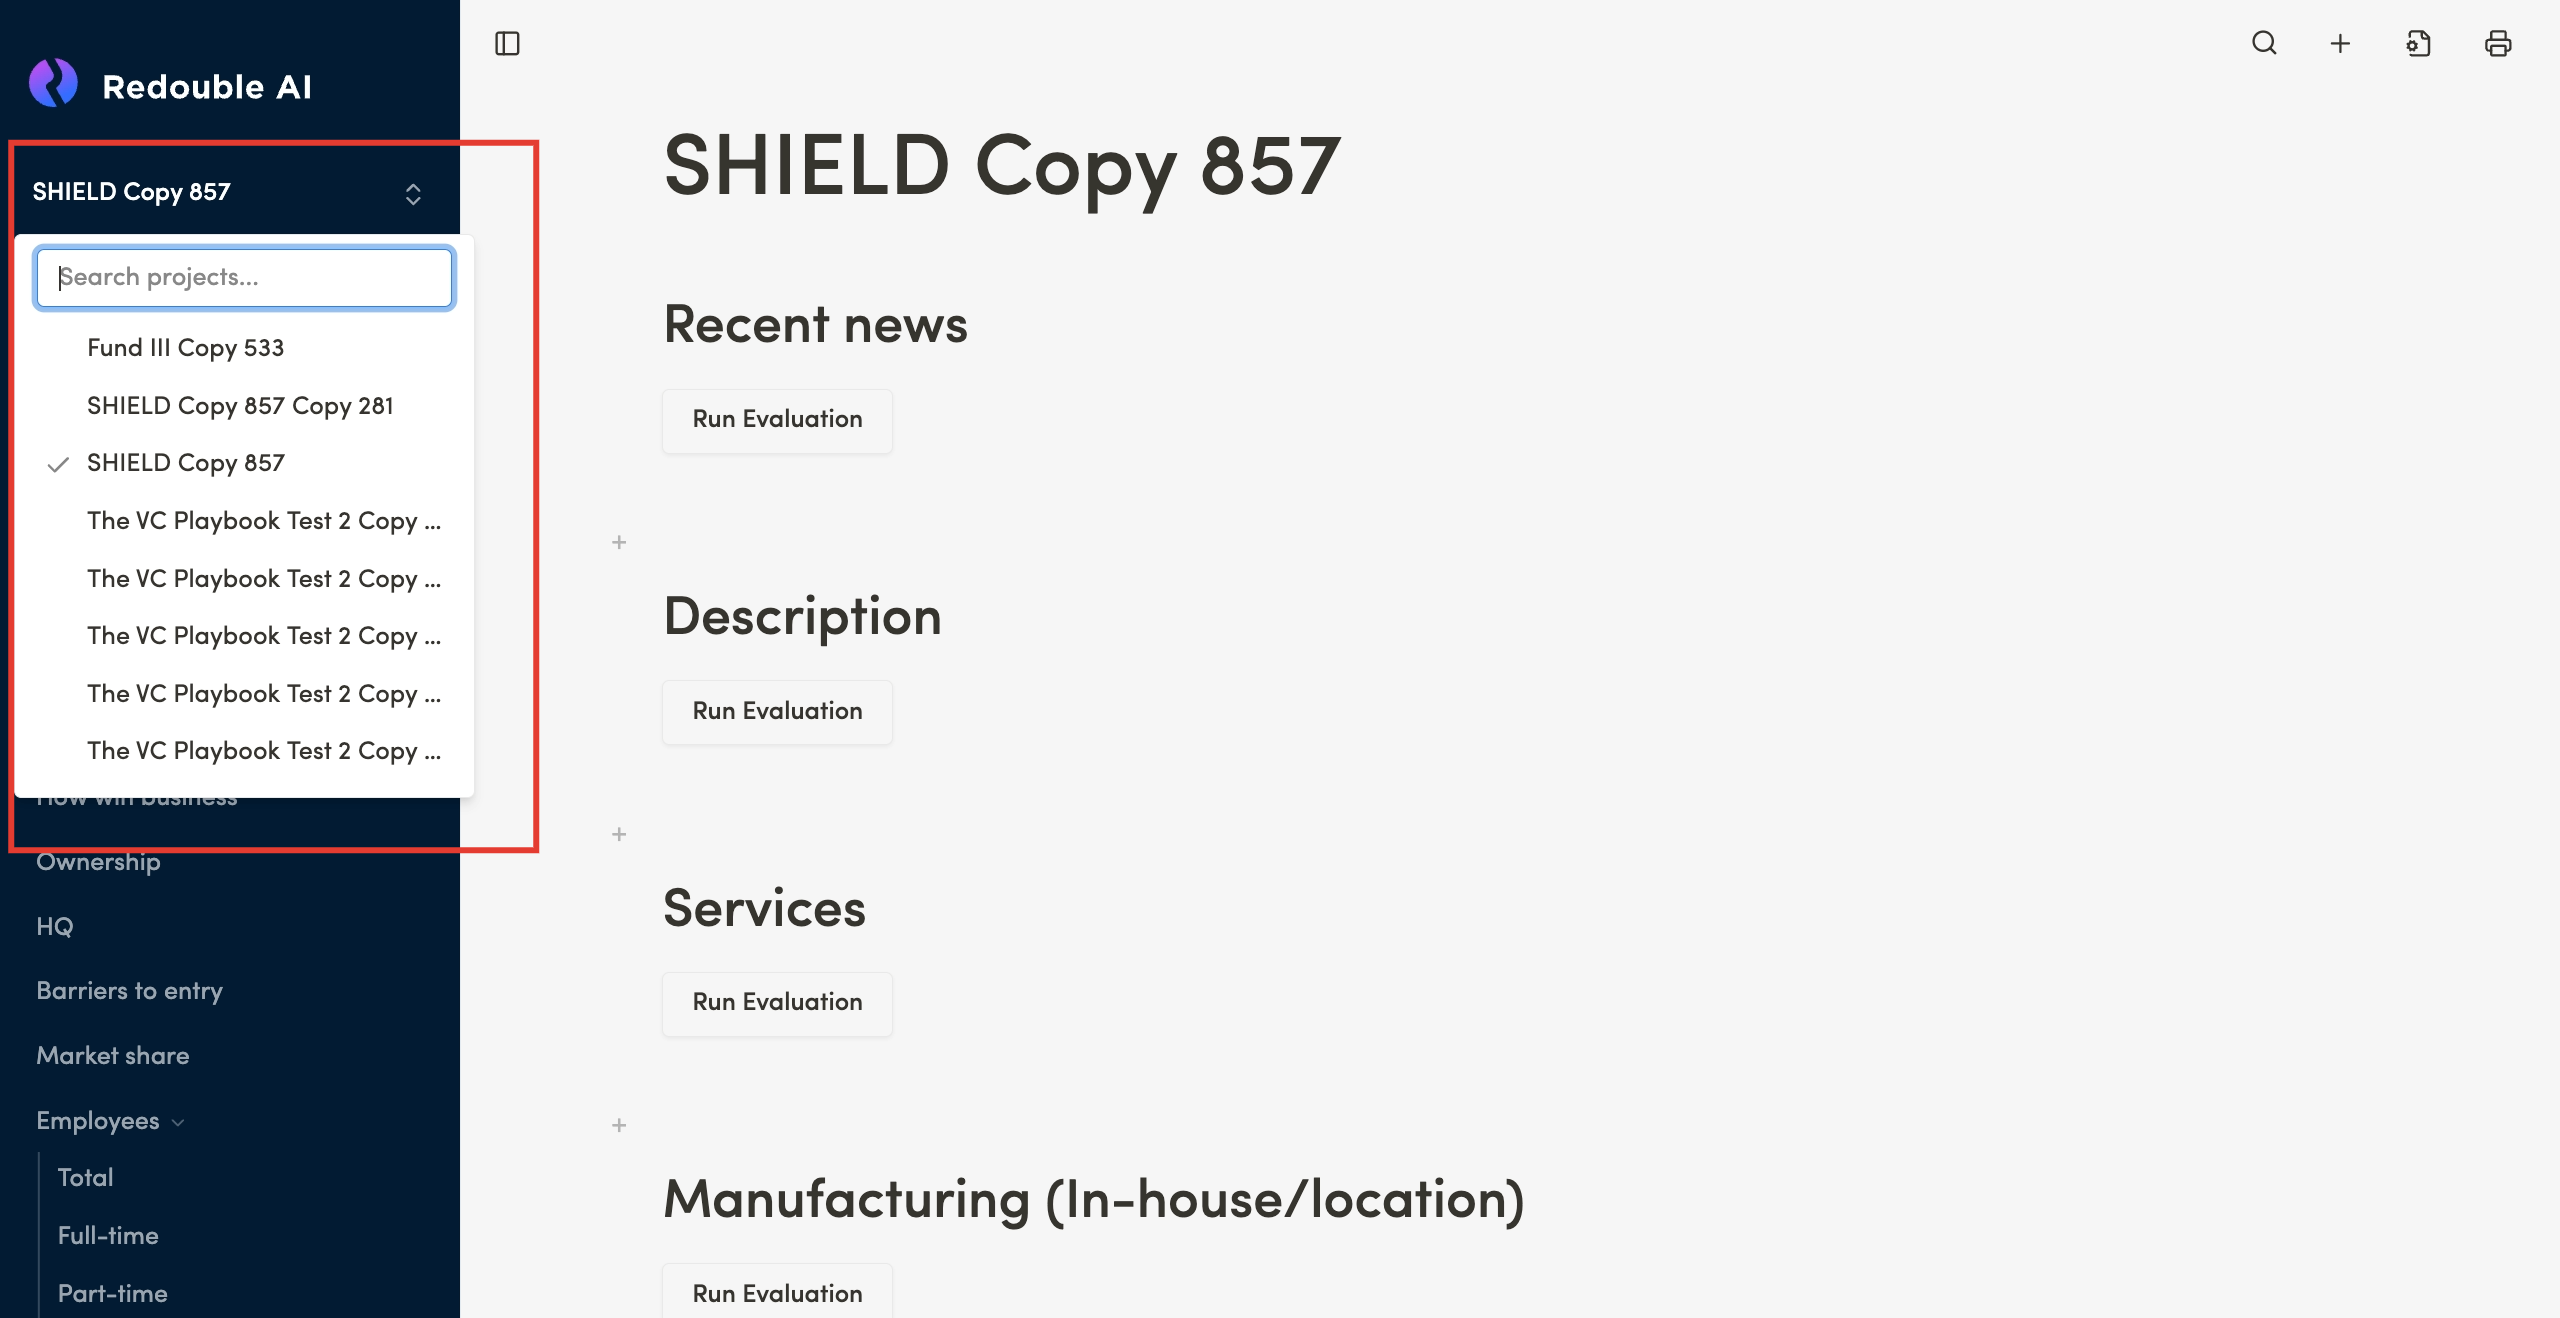
In the left sidebar, click on the current project name or the arrow icon
-
A dropdown menu will open and display:
- "Search projects..." — a search field enabling quick project lookup
- A list of all available projects

-
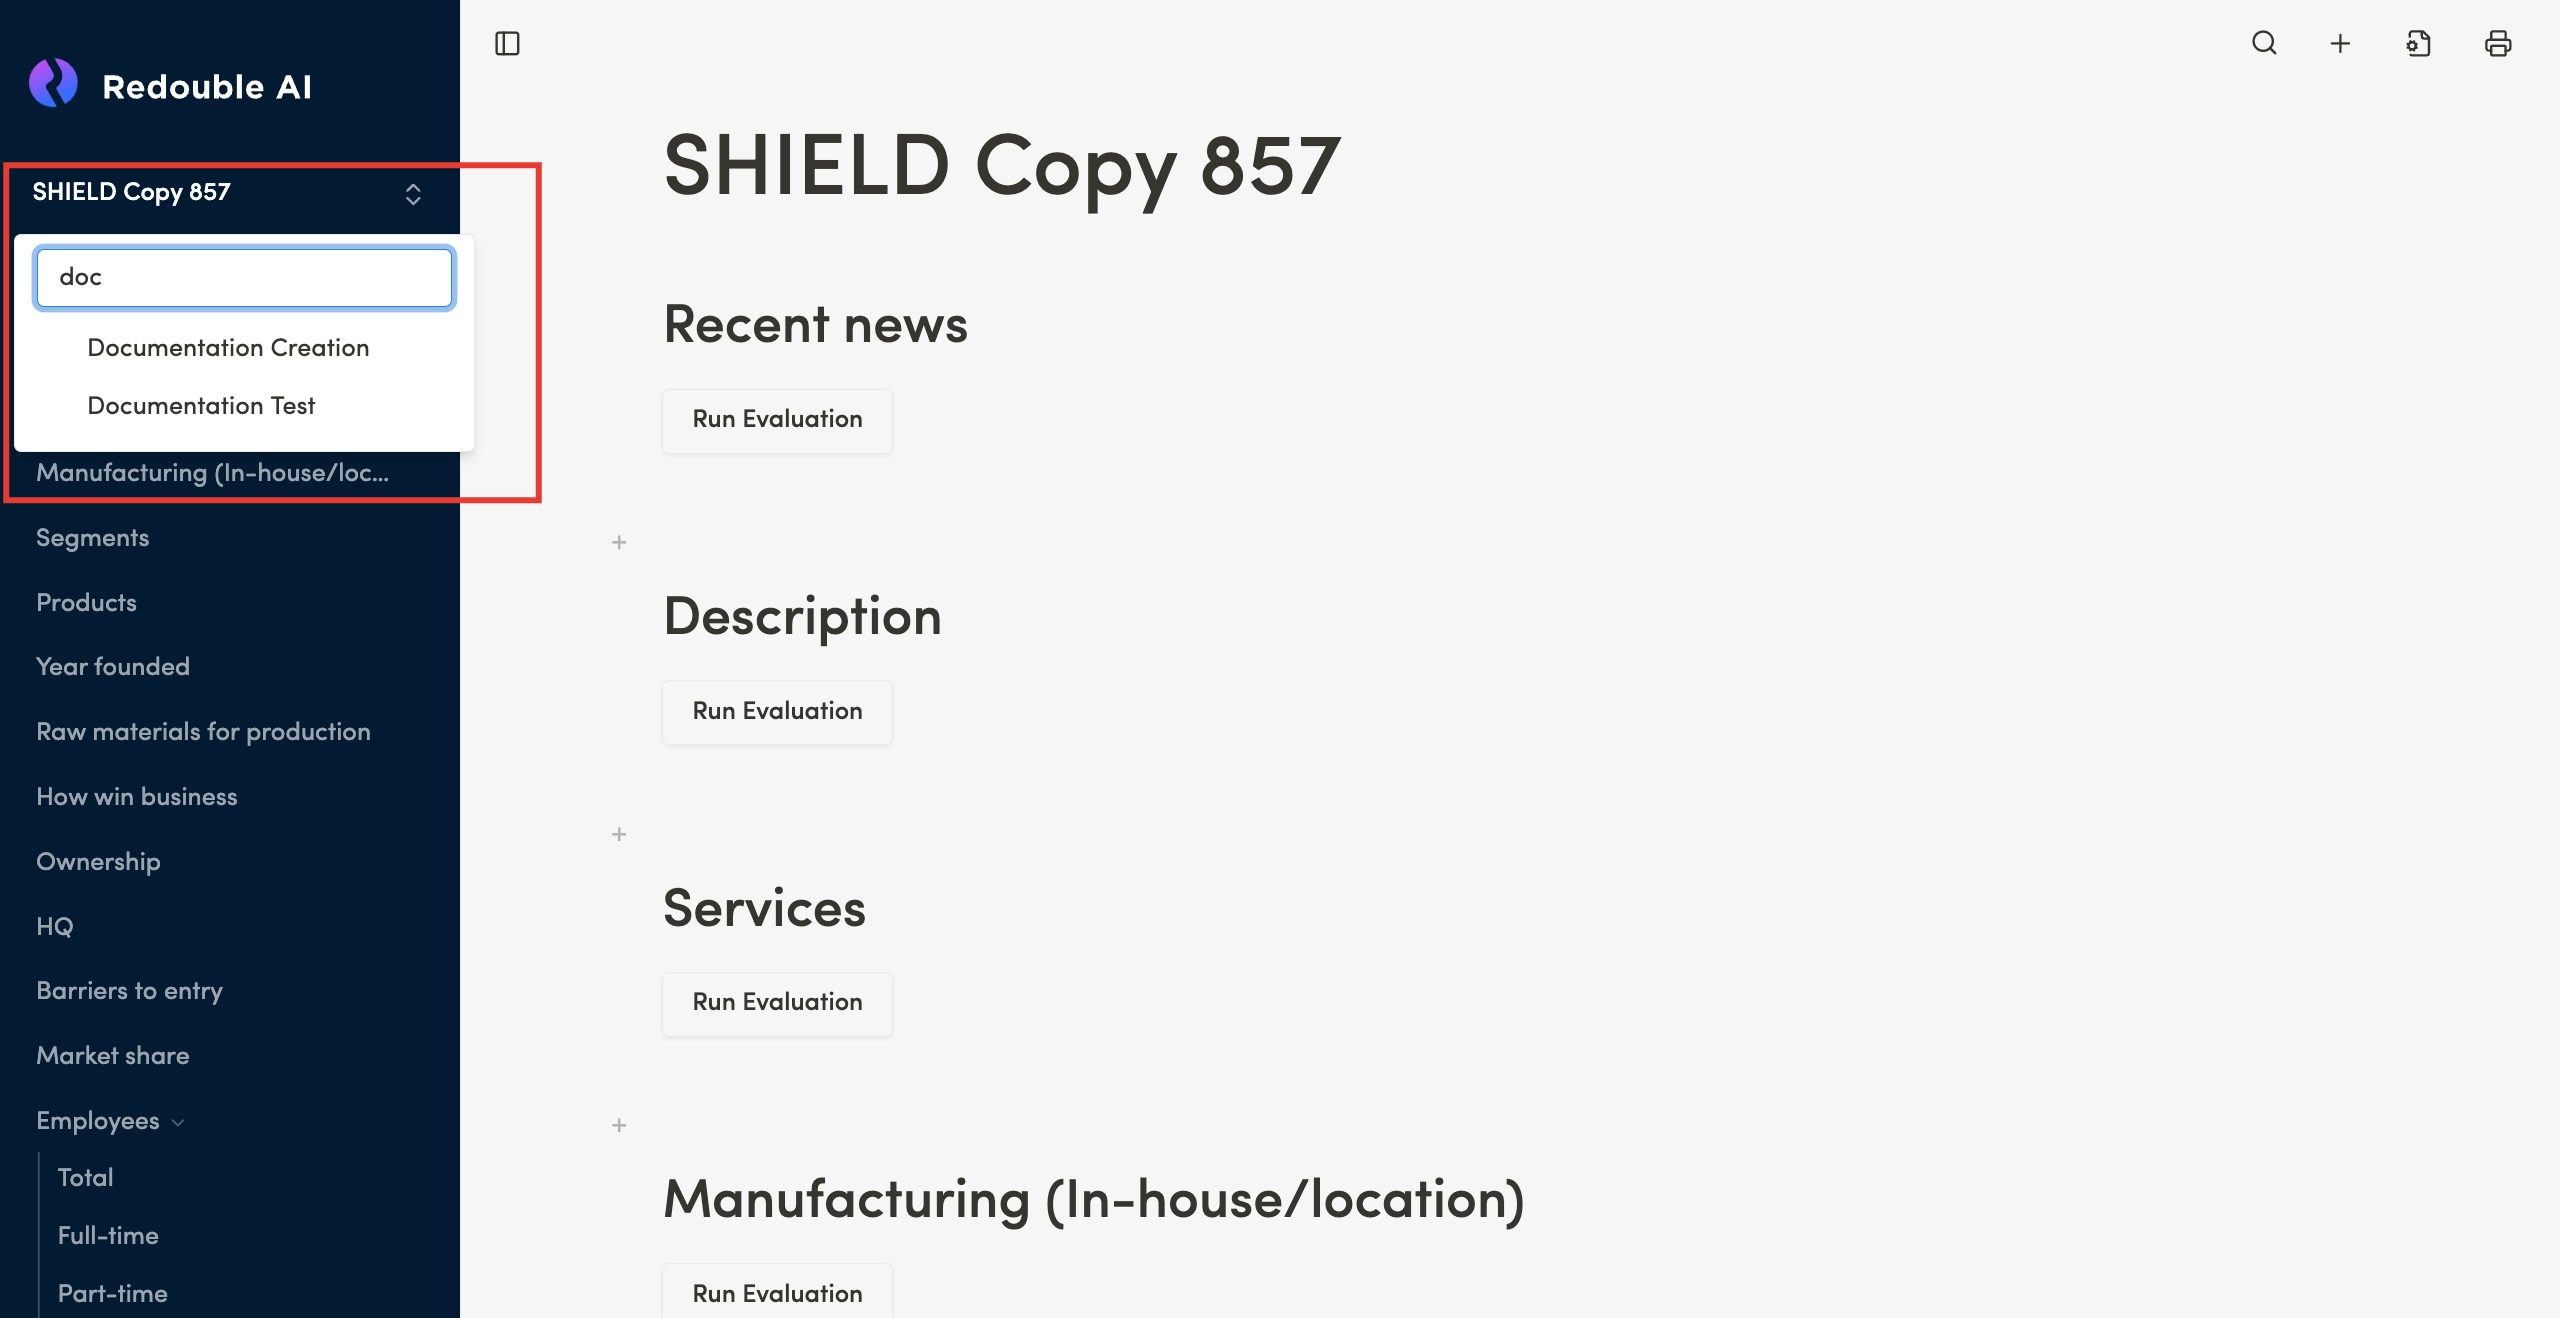
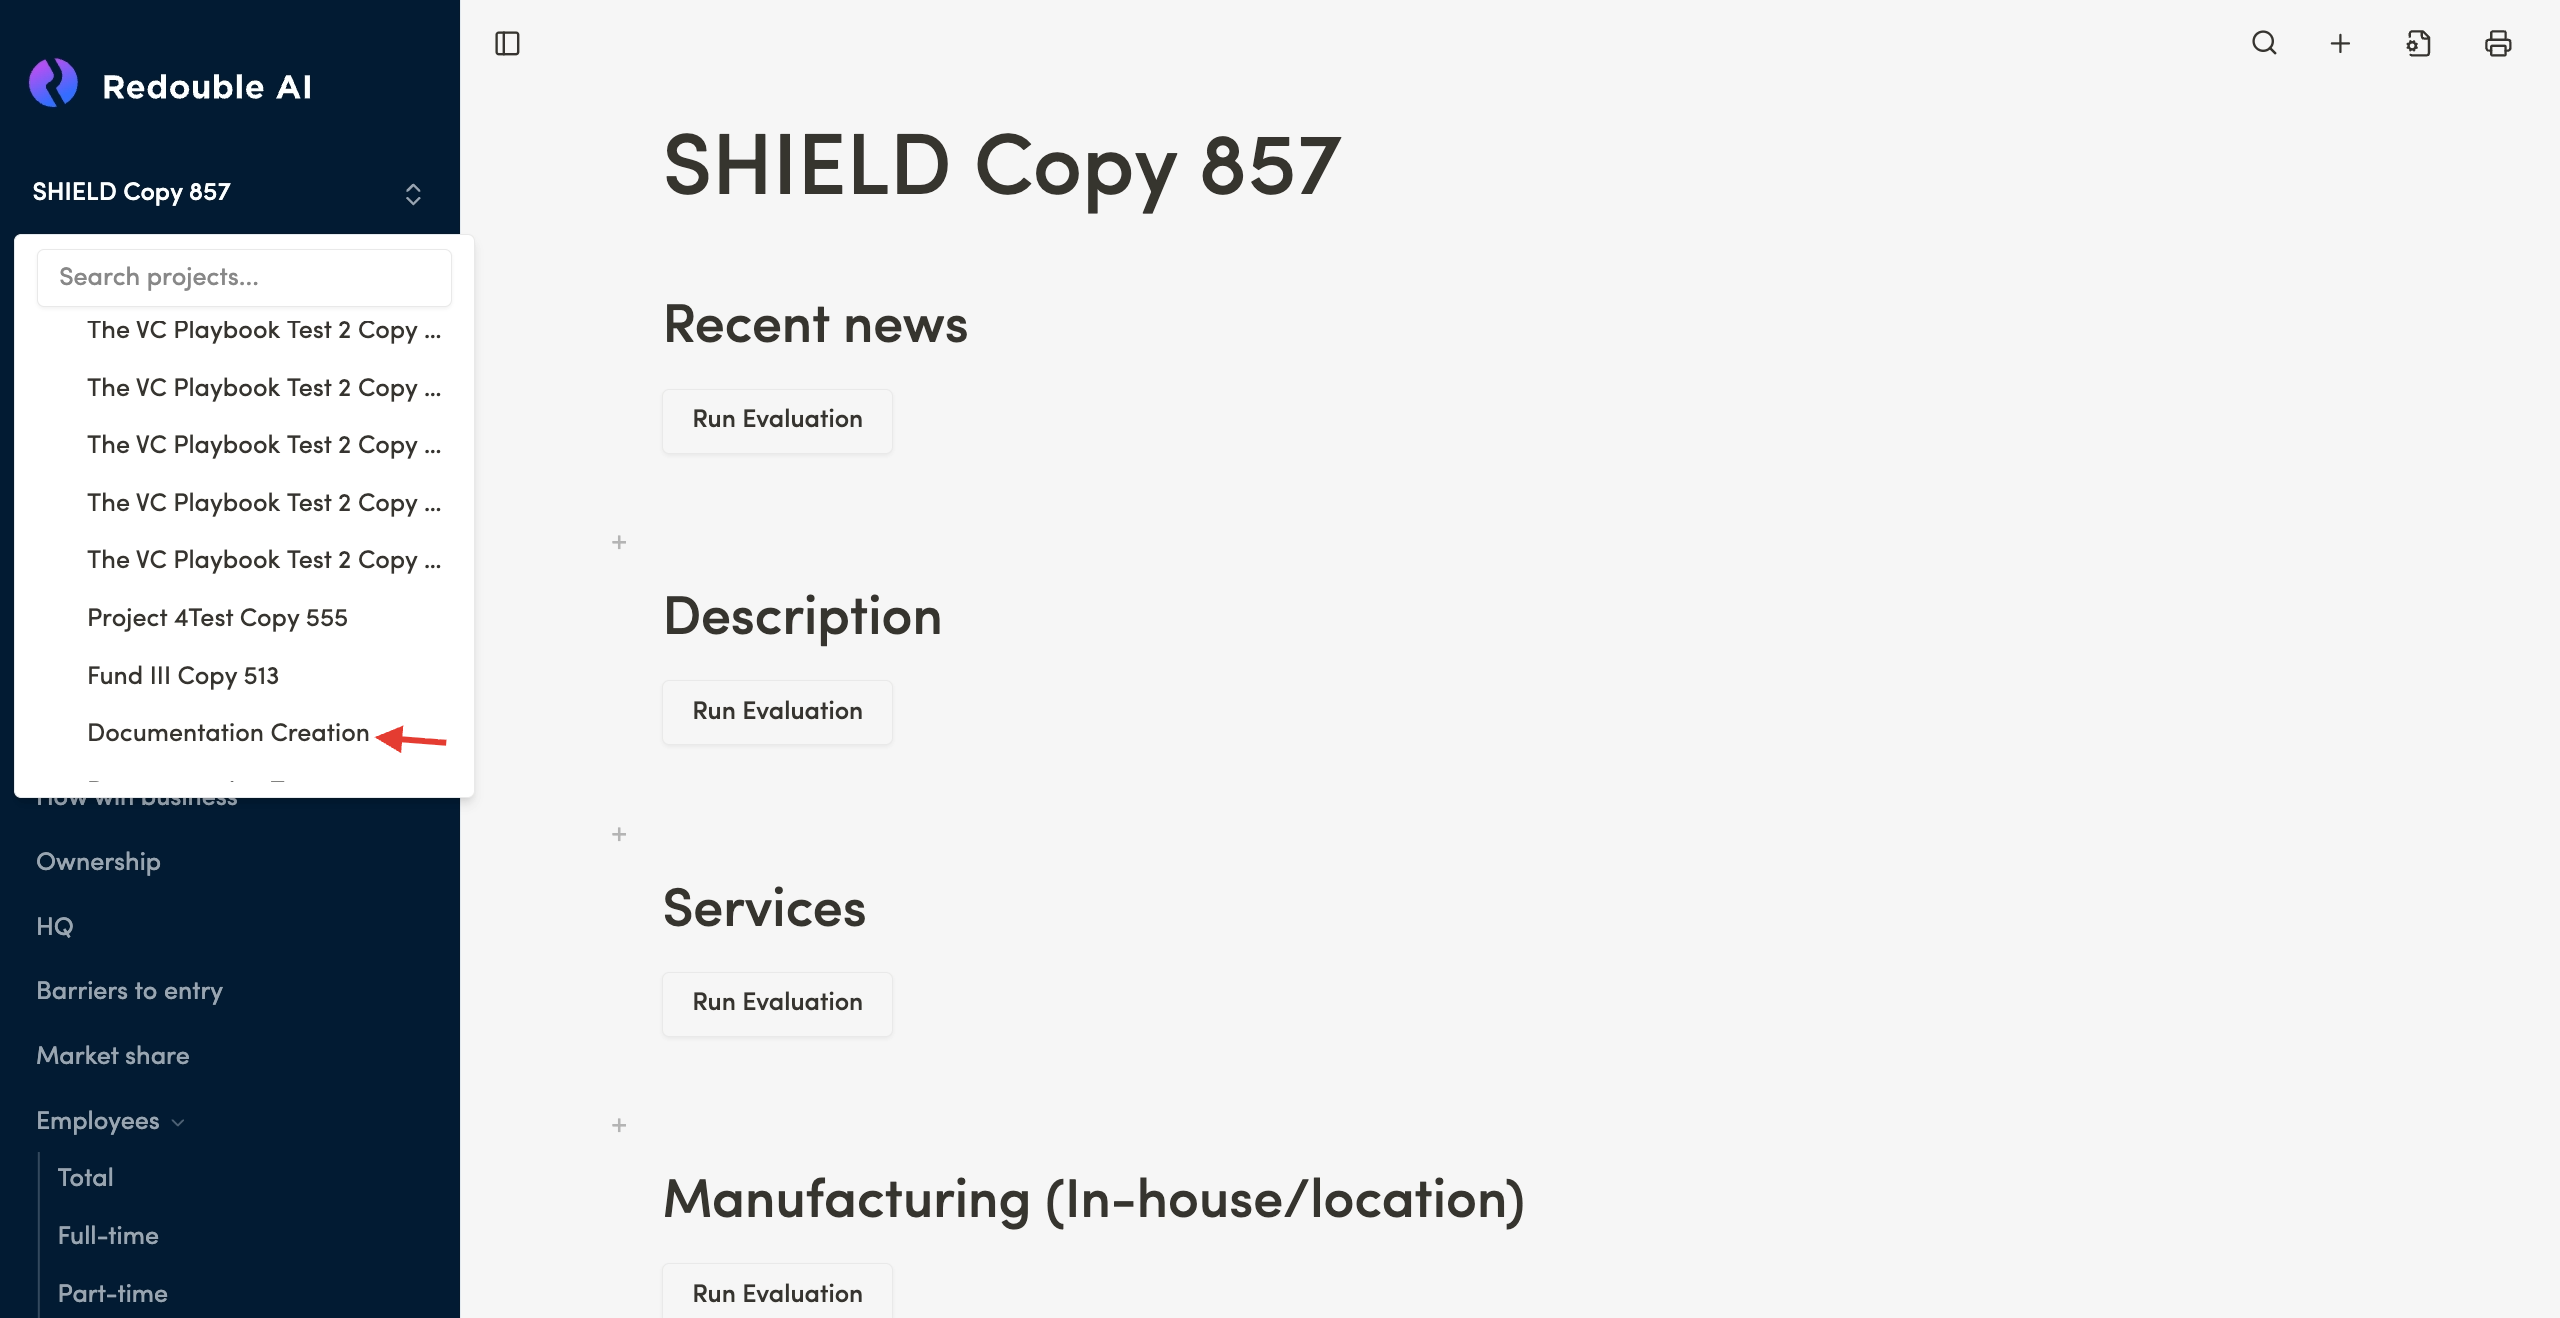
Select the needed project from the list or use search:
- Enter the project name in the search field
- Alternatively, scroll to select the project from the list


Result: You have switched to the selected project. The project's main page will open with all its questions and documents.
Additional information: The project list is displayed in order of last use or creation. The current active project is marked in the list.
1.3 Printing/ downloading the project
Preconditions:
- You are logged into the Redouble AI system
- You have at least one project
Steps:
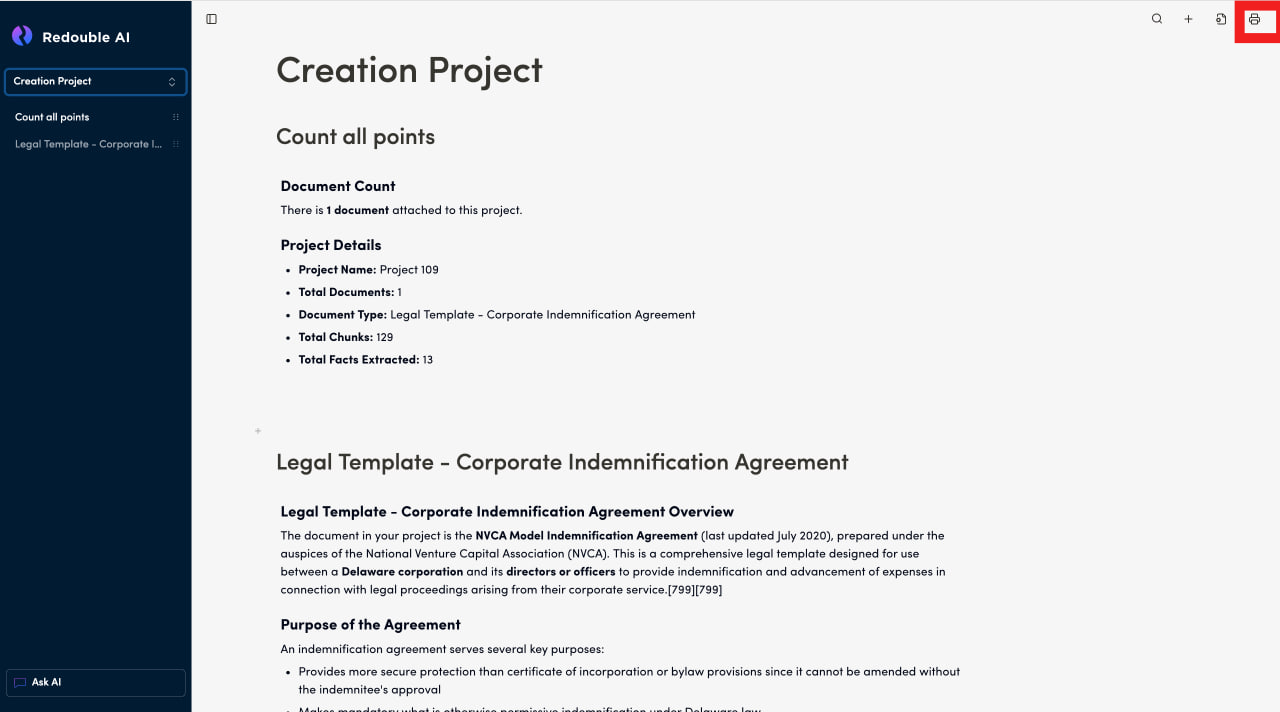
- Open the project you would like to print
- In the top toolbar, click on the printer icon "Print Document"
- A new browser tab will open within which you can:
- Print a project
- Save to PDF
- Click the "Print" or "Save" button
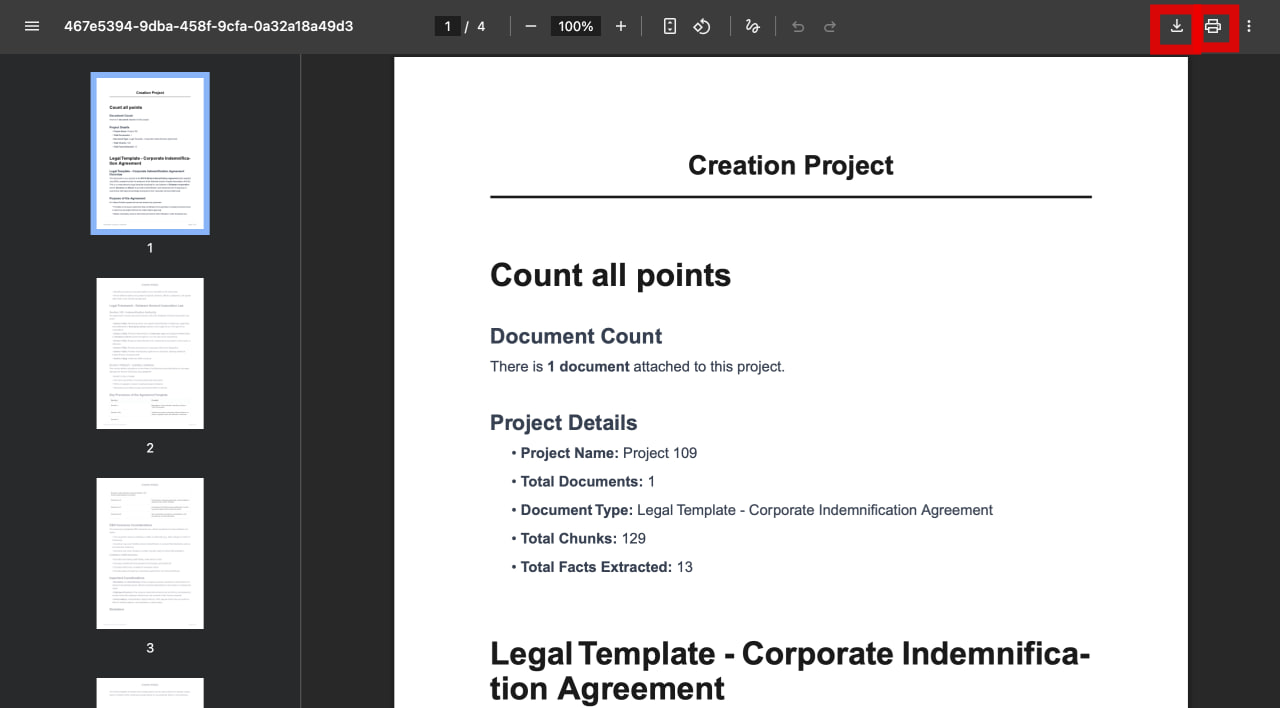
Result: The section or document has been printed or saved as a PDF file to your computer.
1.4 Upload documents to the newly created project
Preconditions:
- You are logged into the Redouble AI system
- You have a newly created project with no documents currently attached
Steps:
-
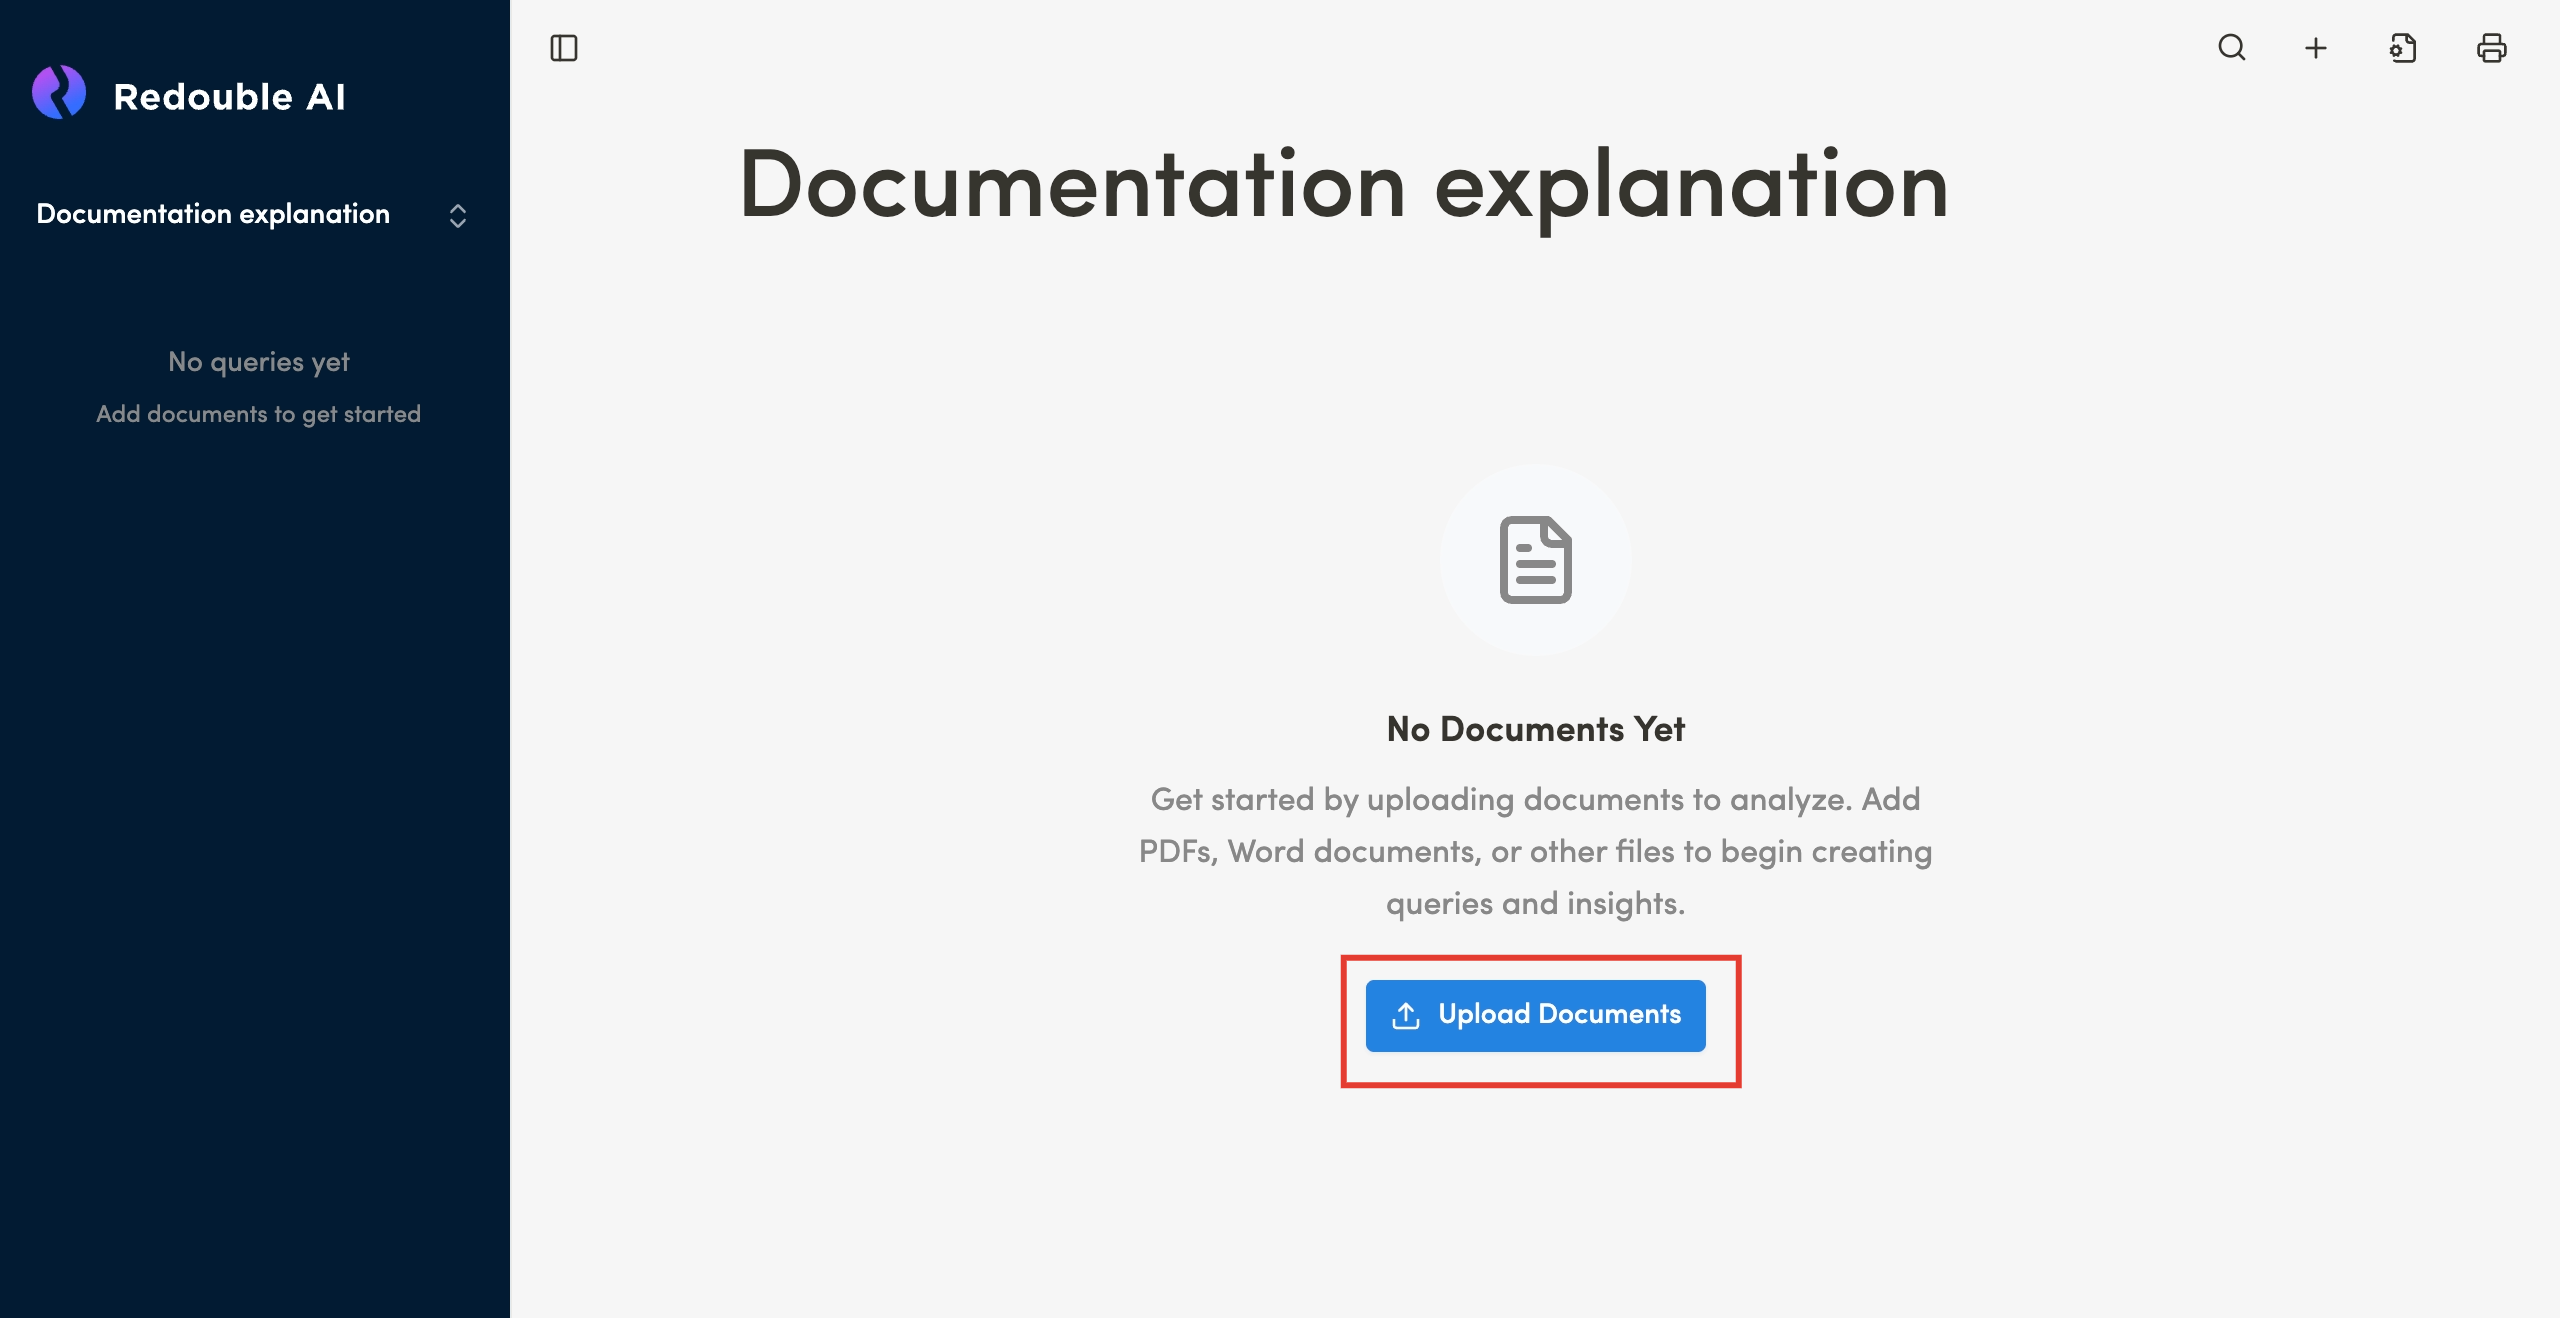
Click the "Upload Documents" button

-
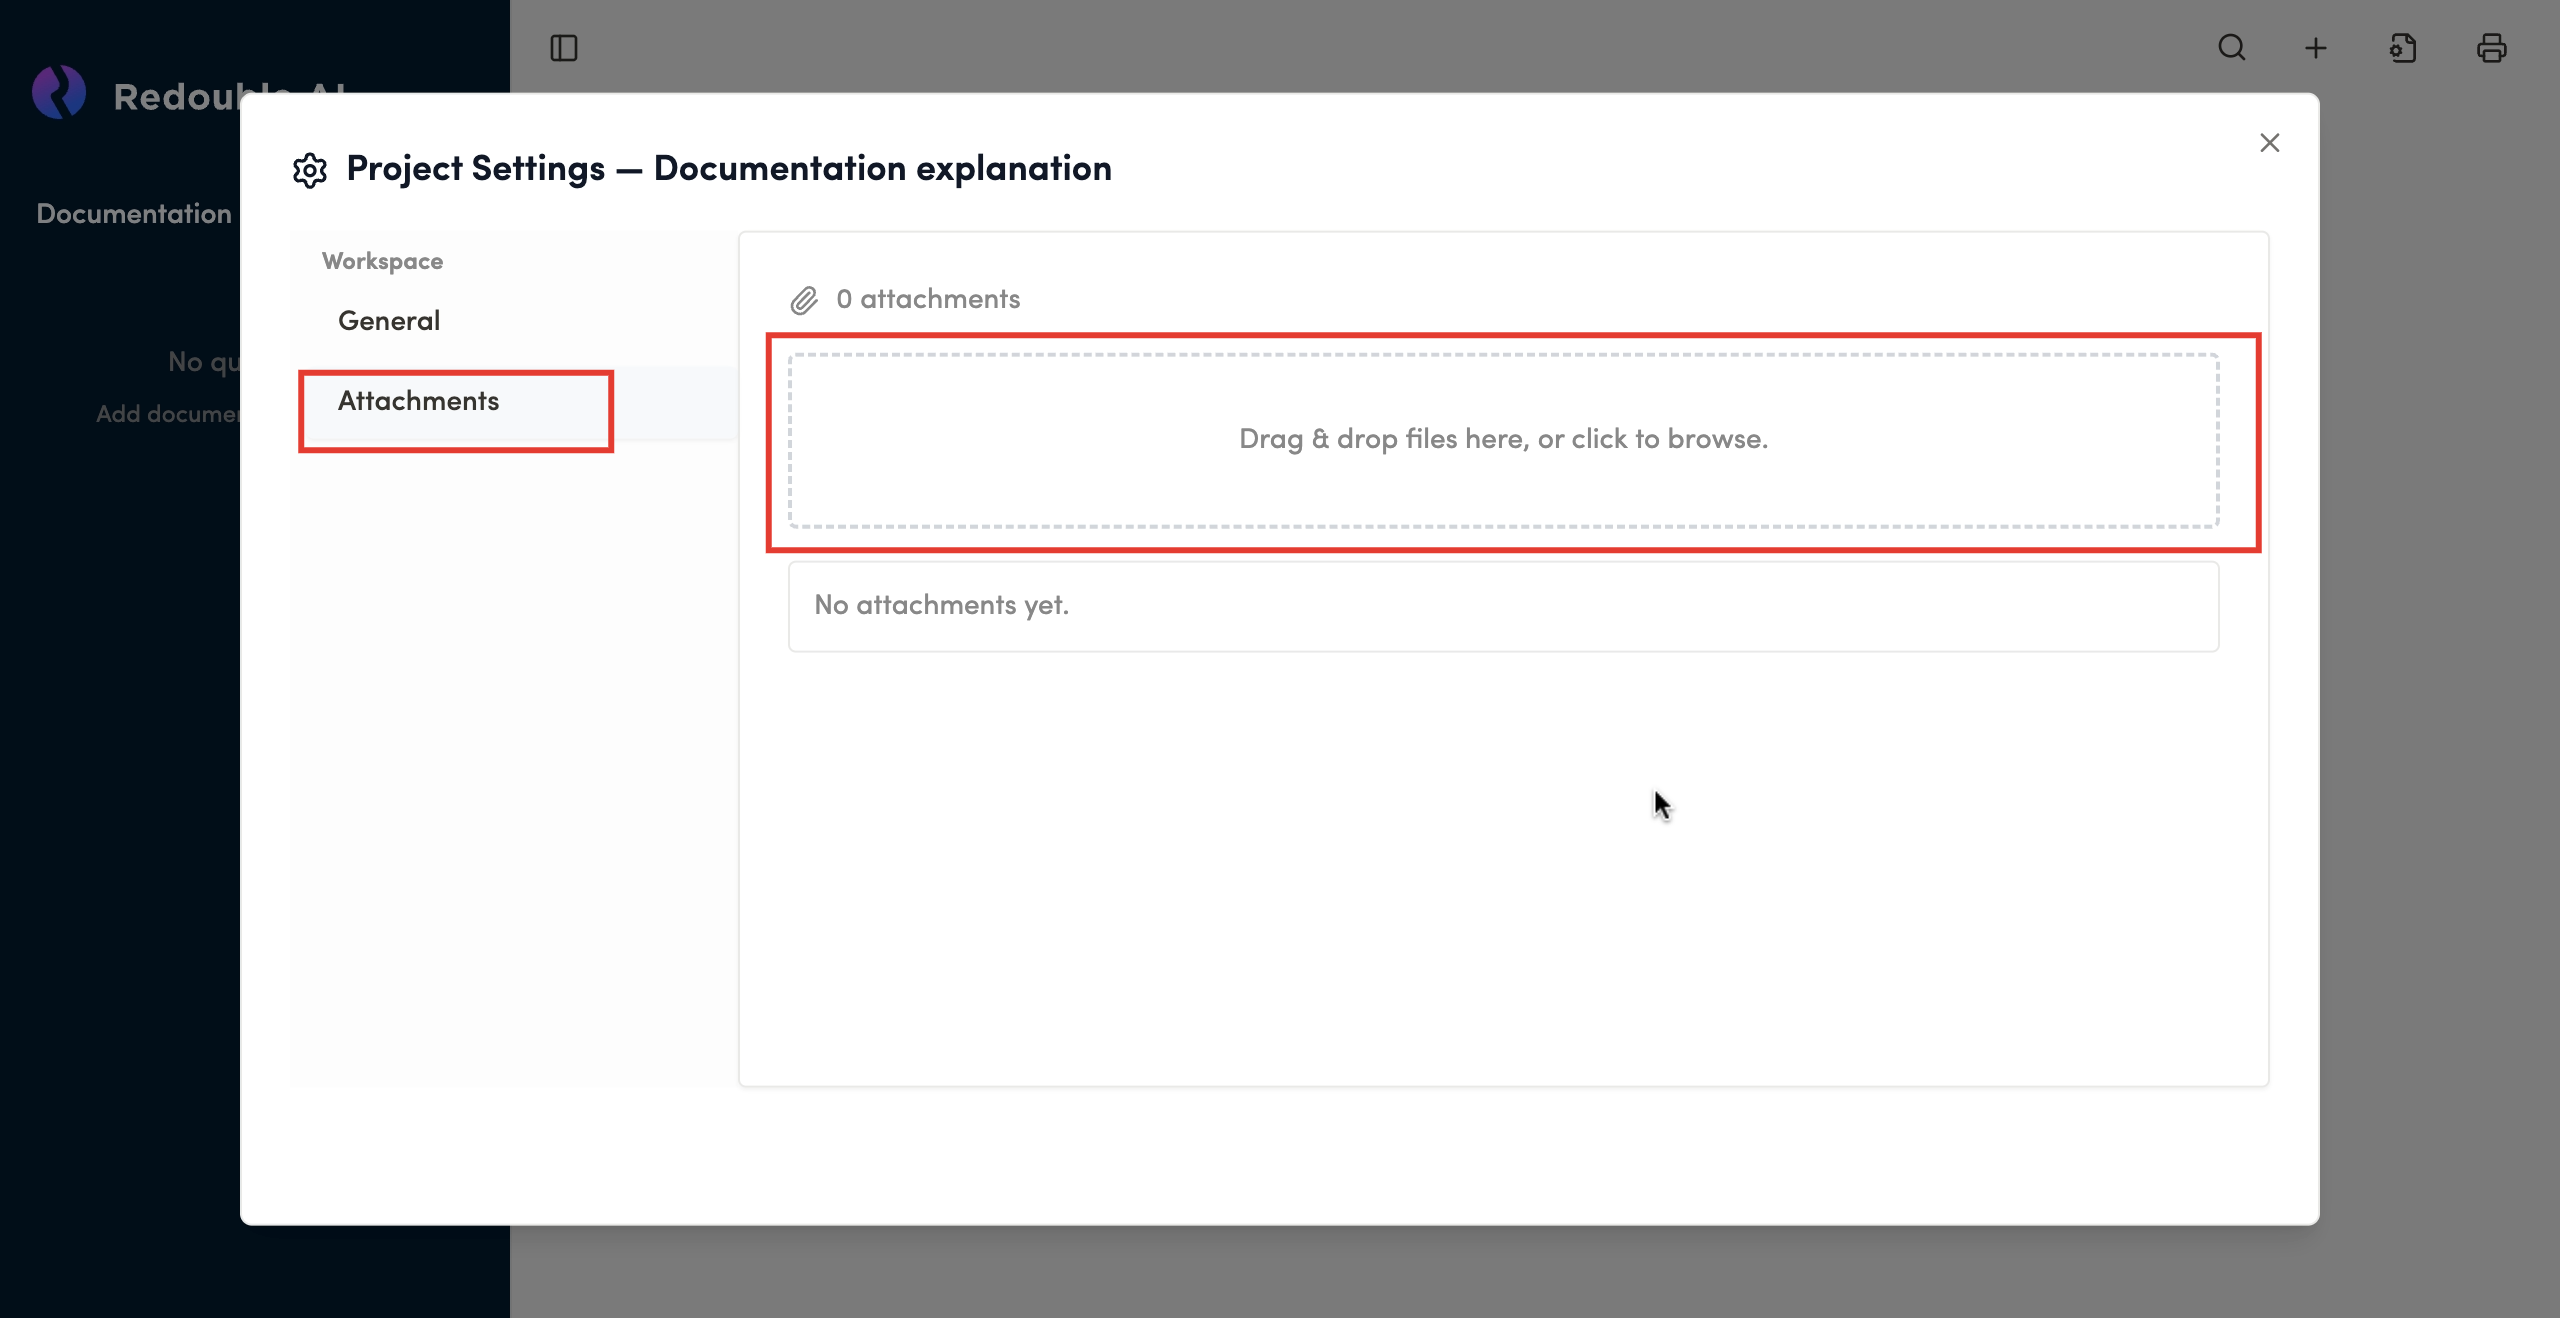
In the dialog window, select "Attachments" in the "Workspace" list, click on the field to select files from your computer or drag files and documents directly into the field

-
Wait for the upload to be completed and see documents added to the list

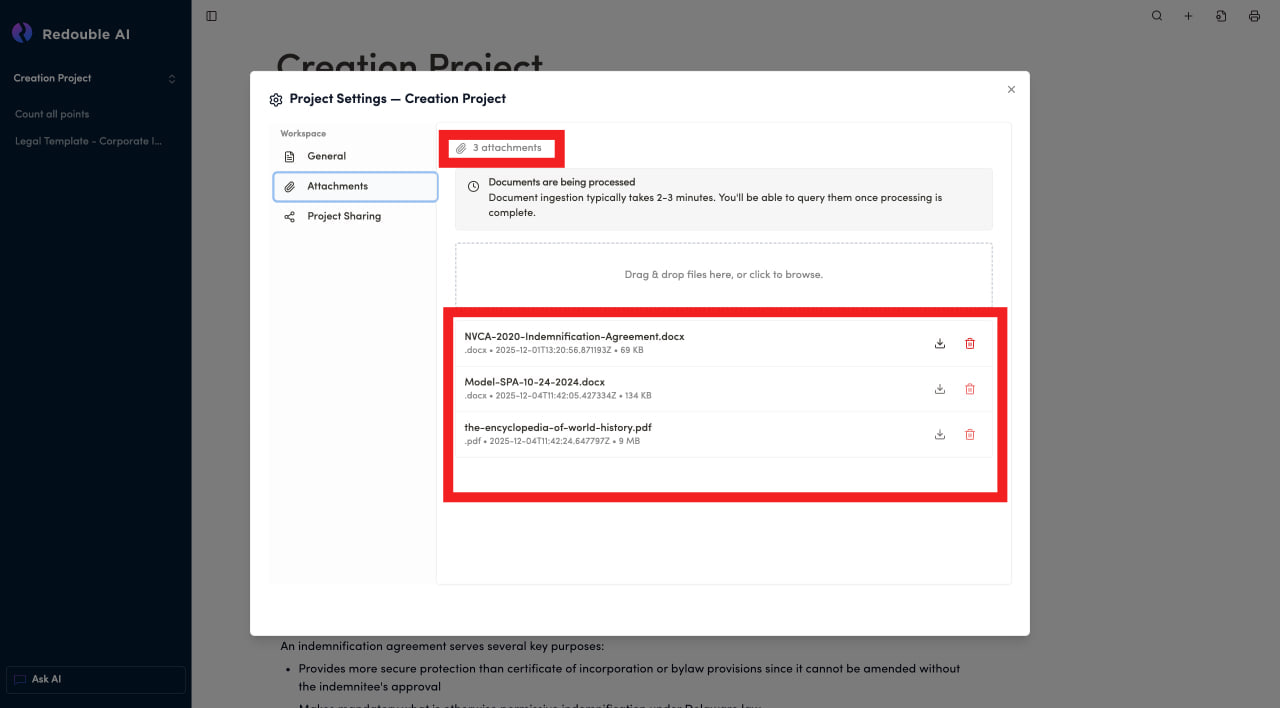
Result: Documents have been successfully attached to the project.
Note: Documents may need 2-3 minutes to ingest.
1.5 Deleting a project
Preconditions:
- You are logged into the Redouble AI system
- You have a project
Steps:
-
Click on the "Settings" icon in the top toolbar

-
In the dialog window, select "General" in the "Workspace" list and scroll to the bottom of the page

-
Click the "Delete Project" button

-
Confirm that you want to delete the project in the popup

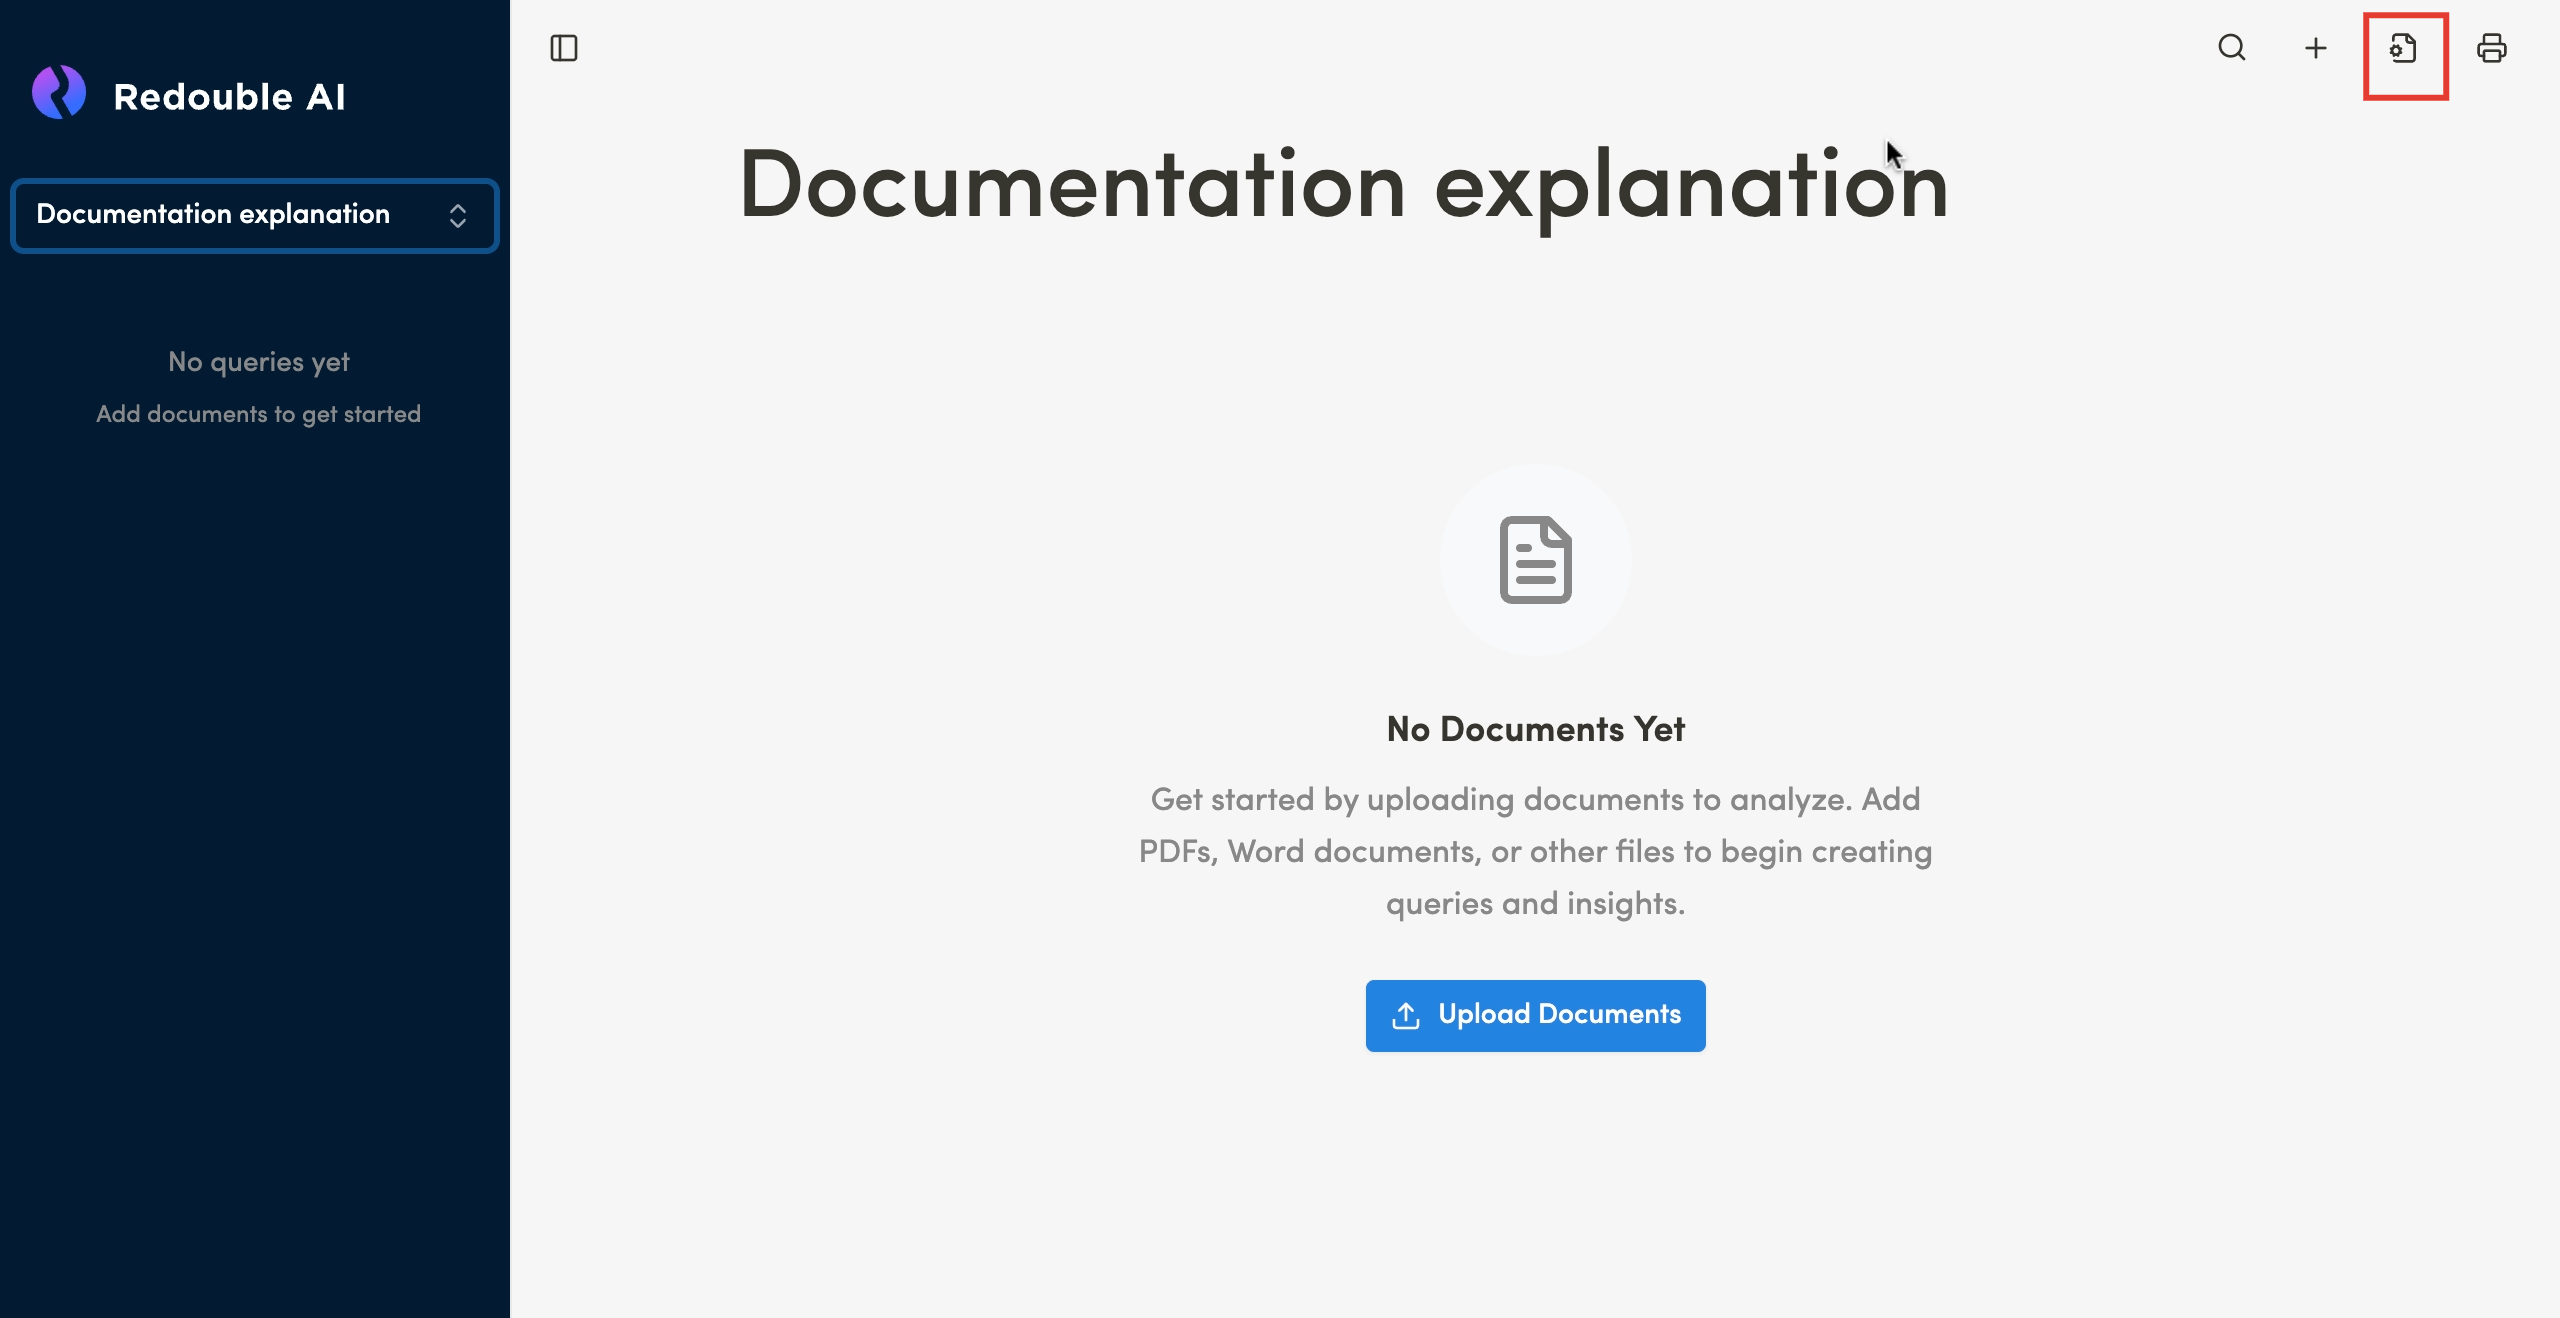
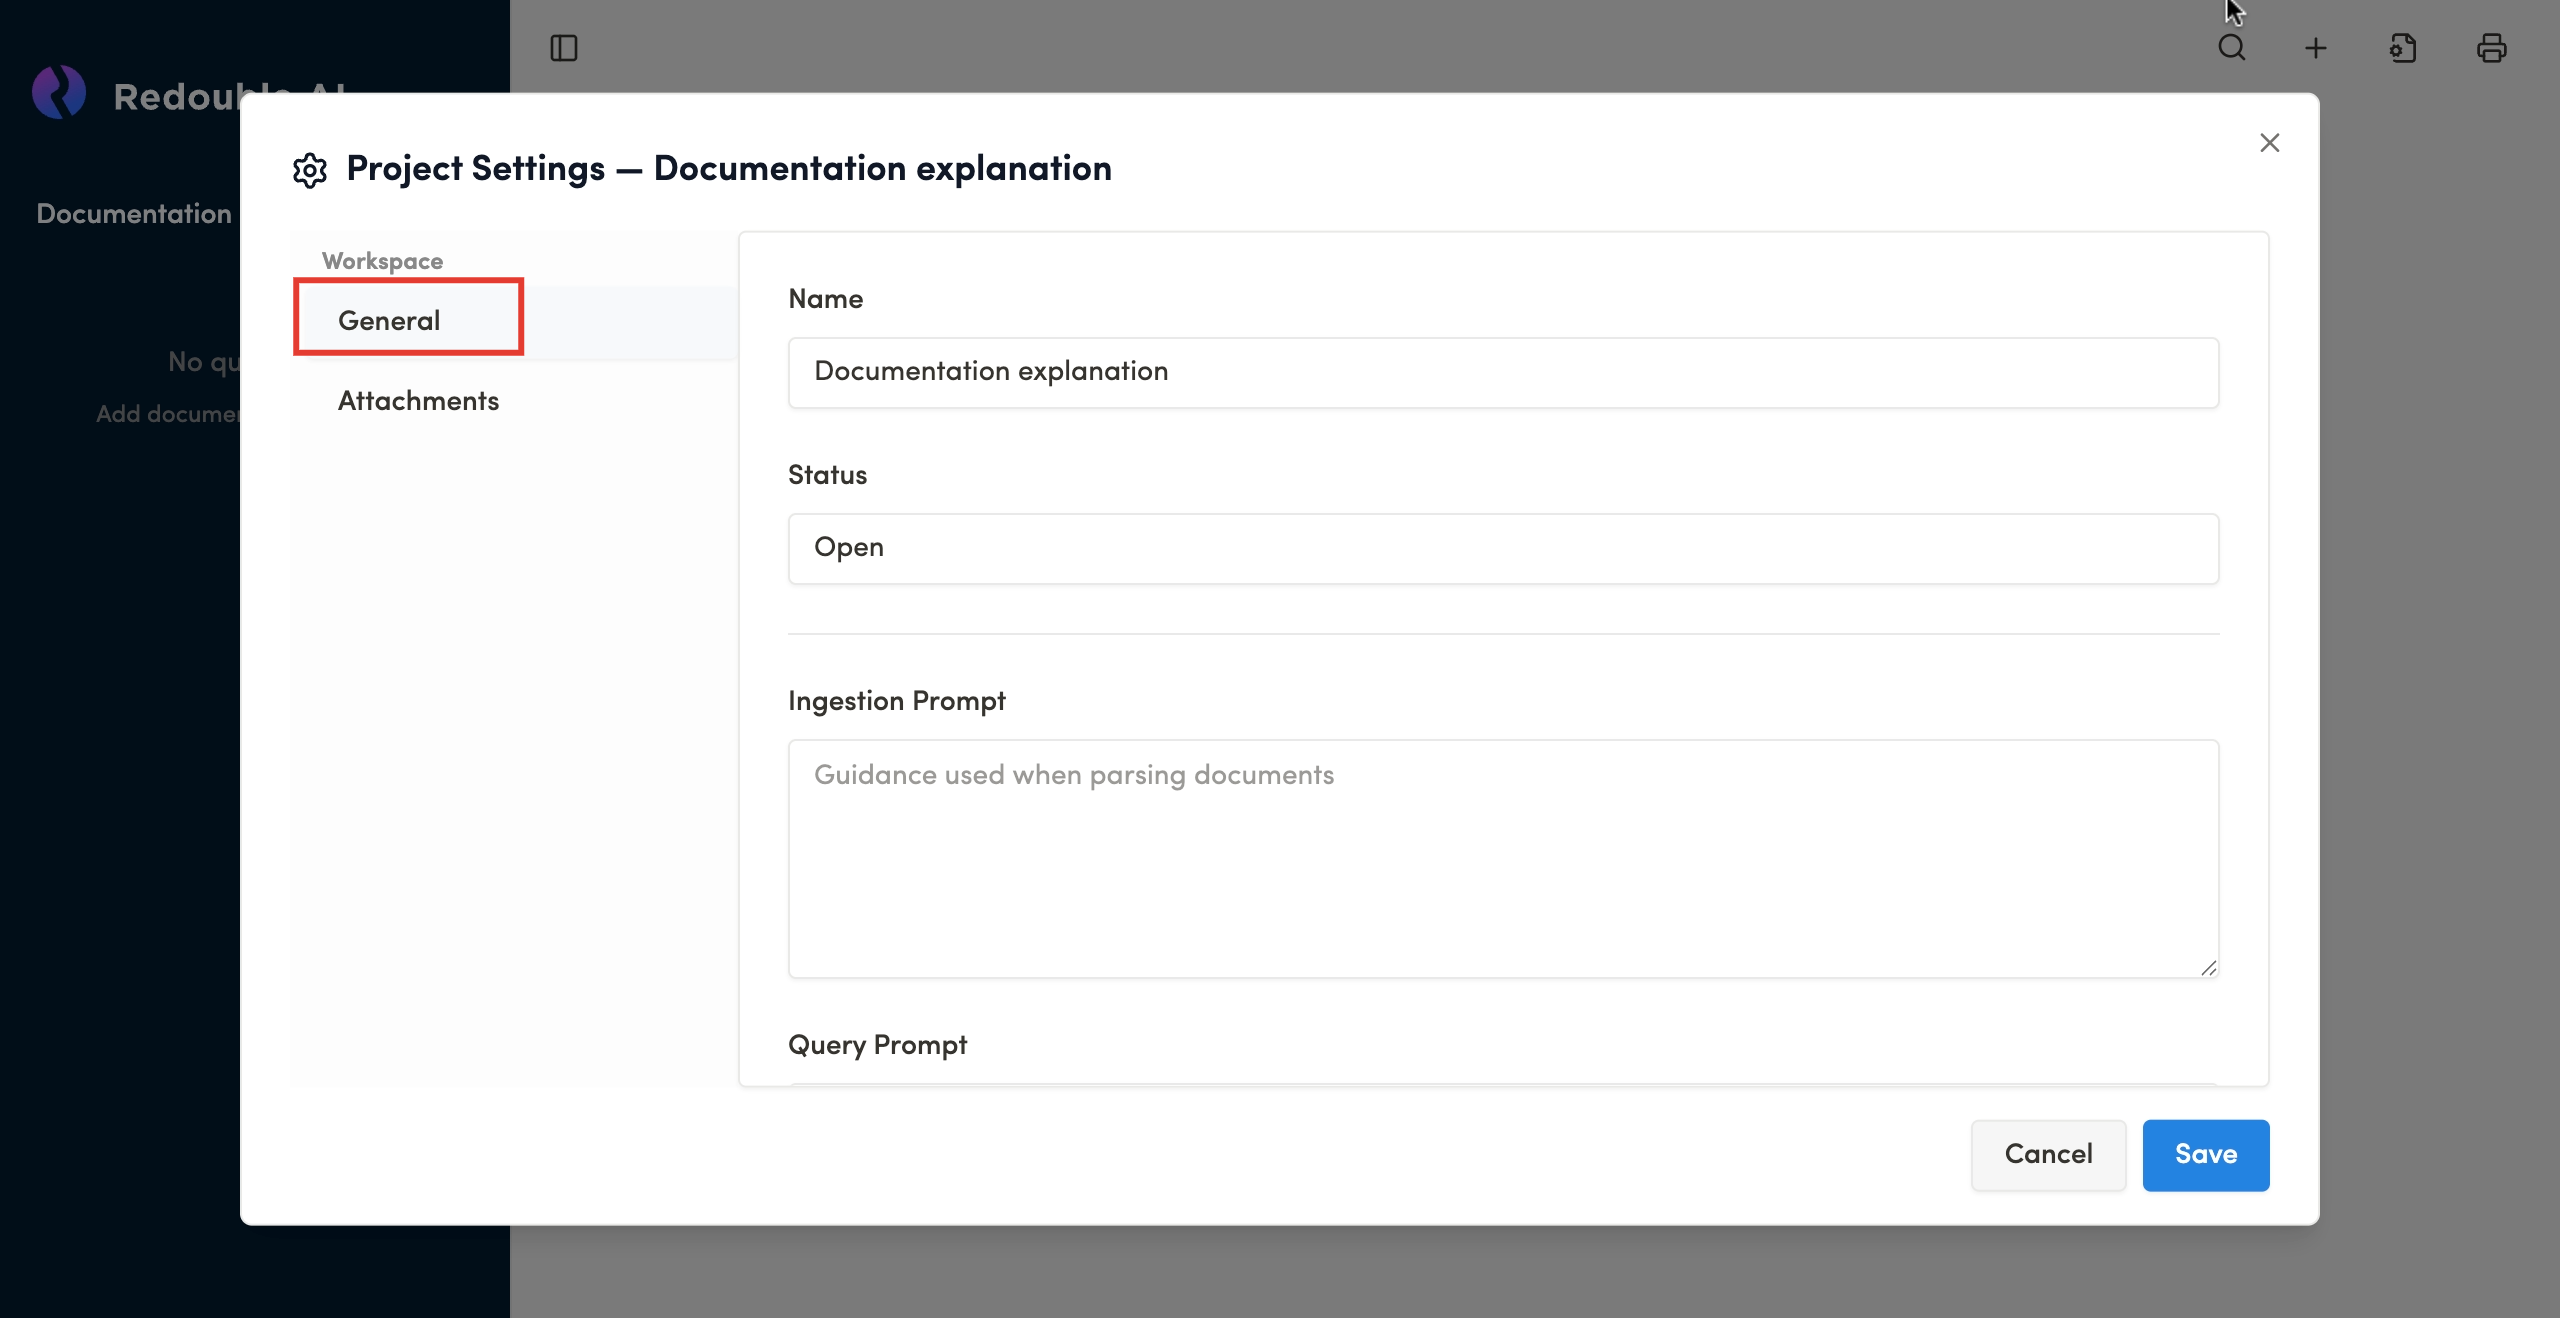
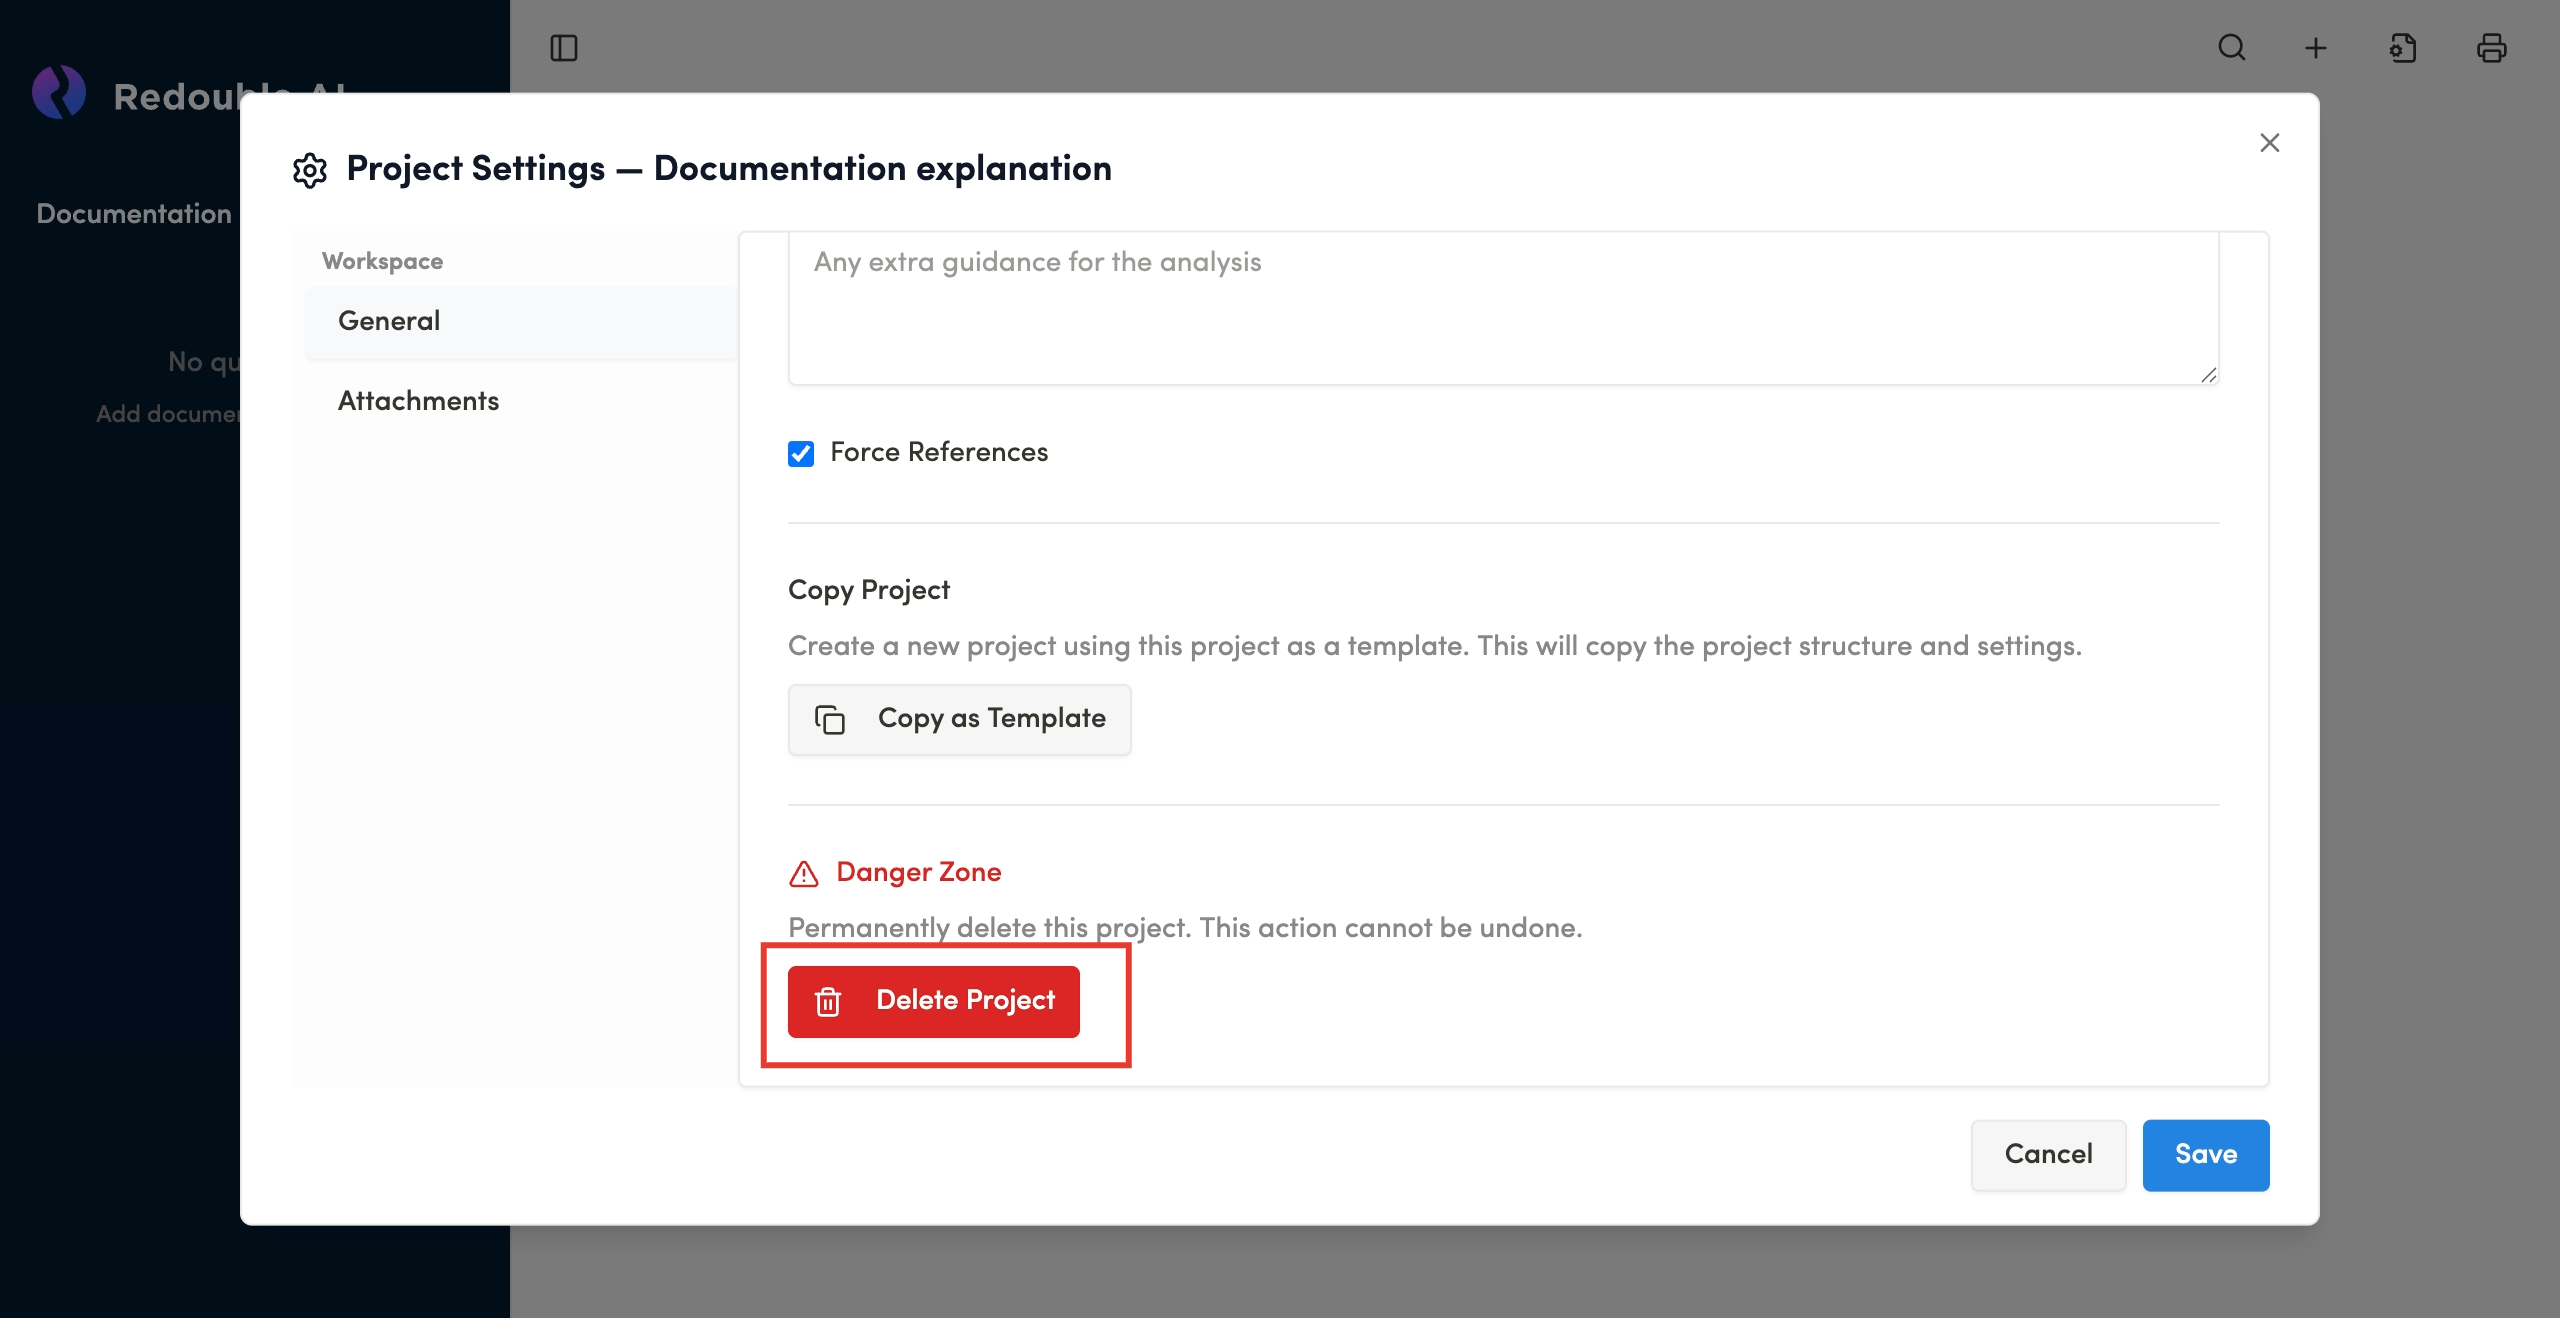
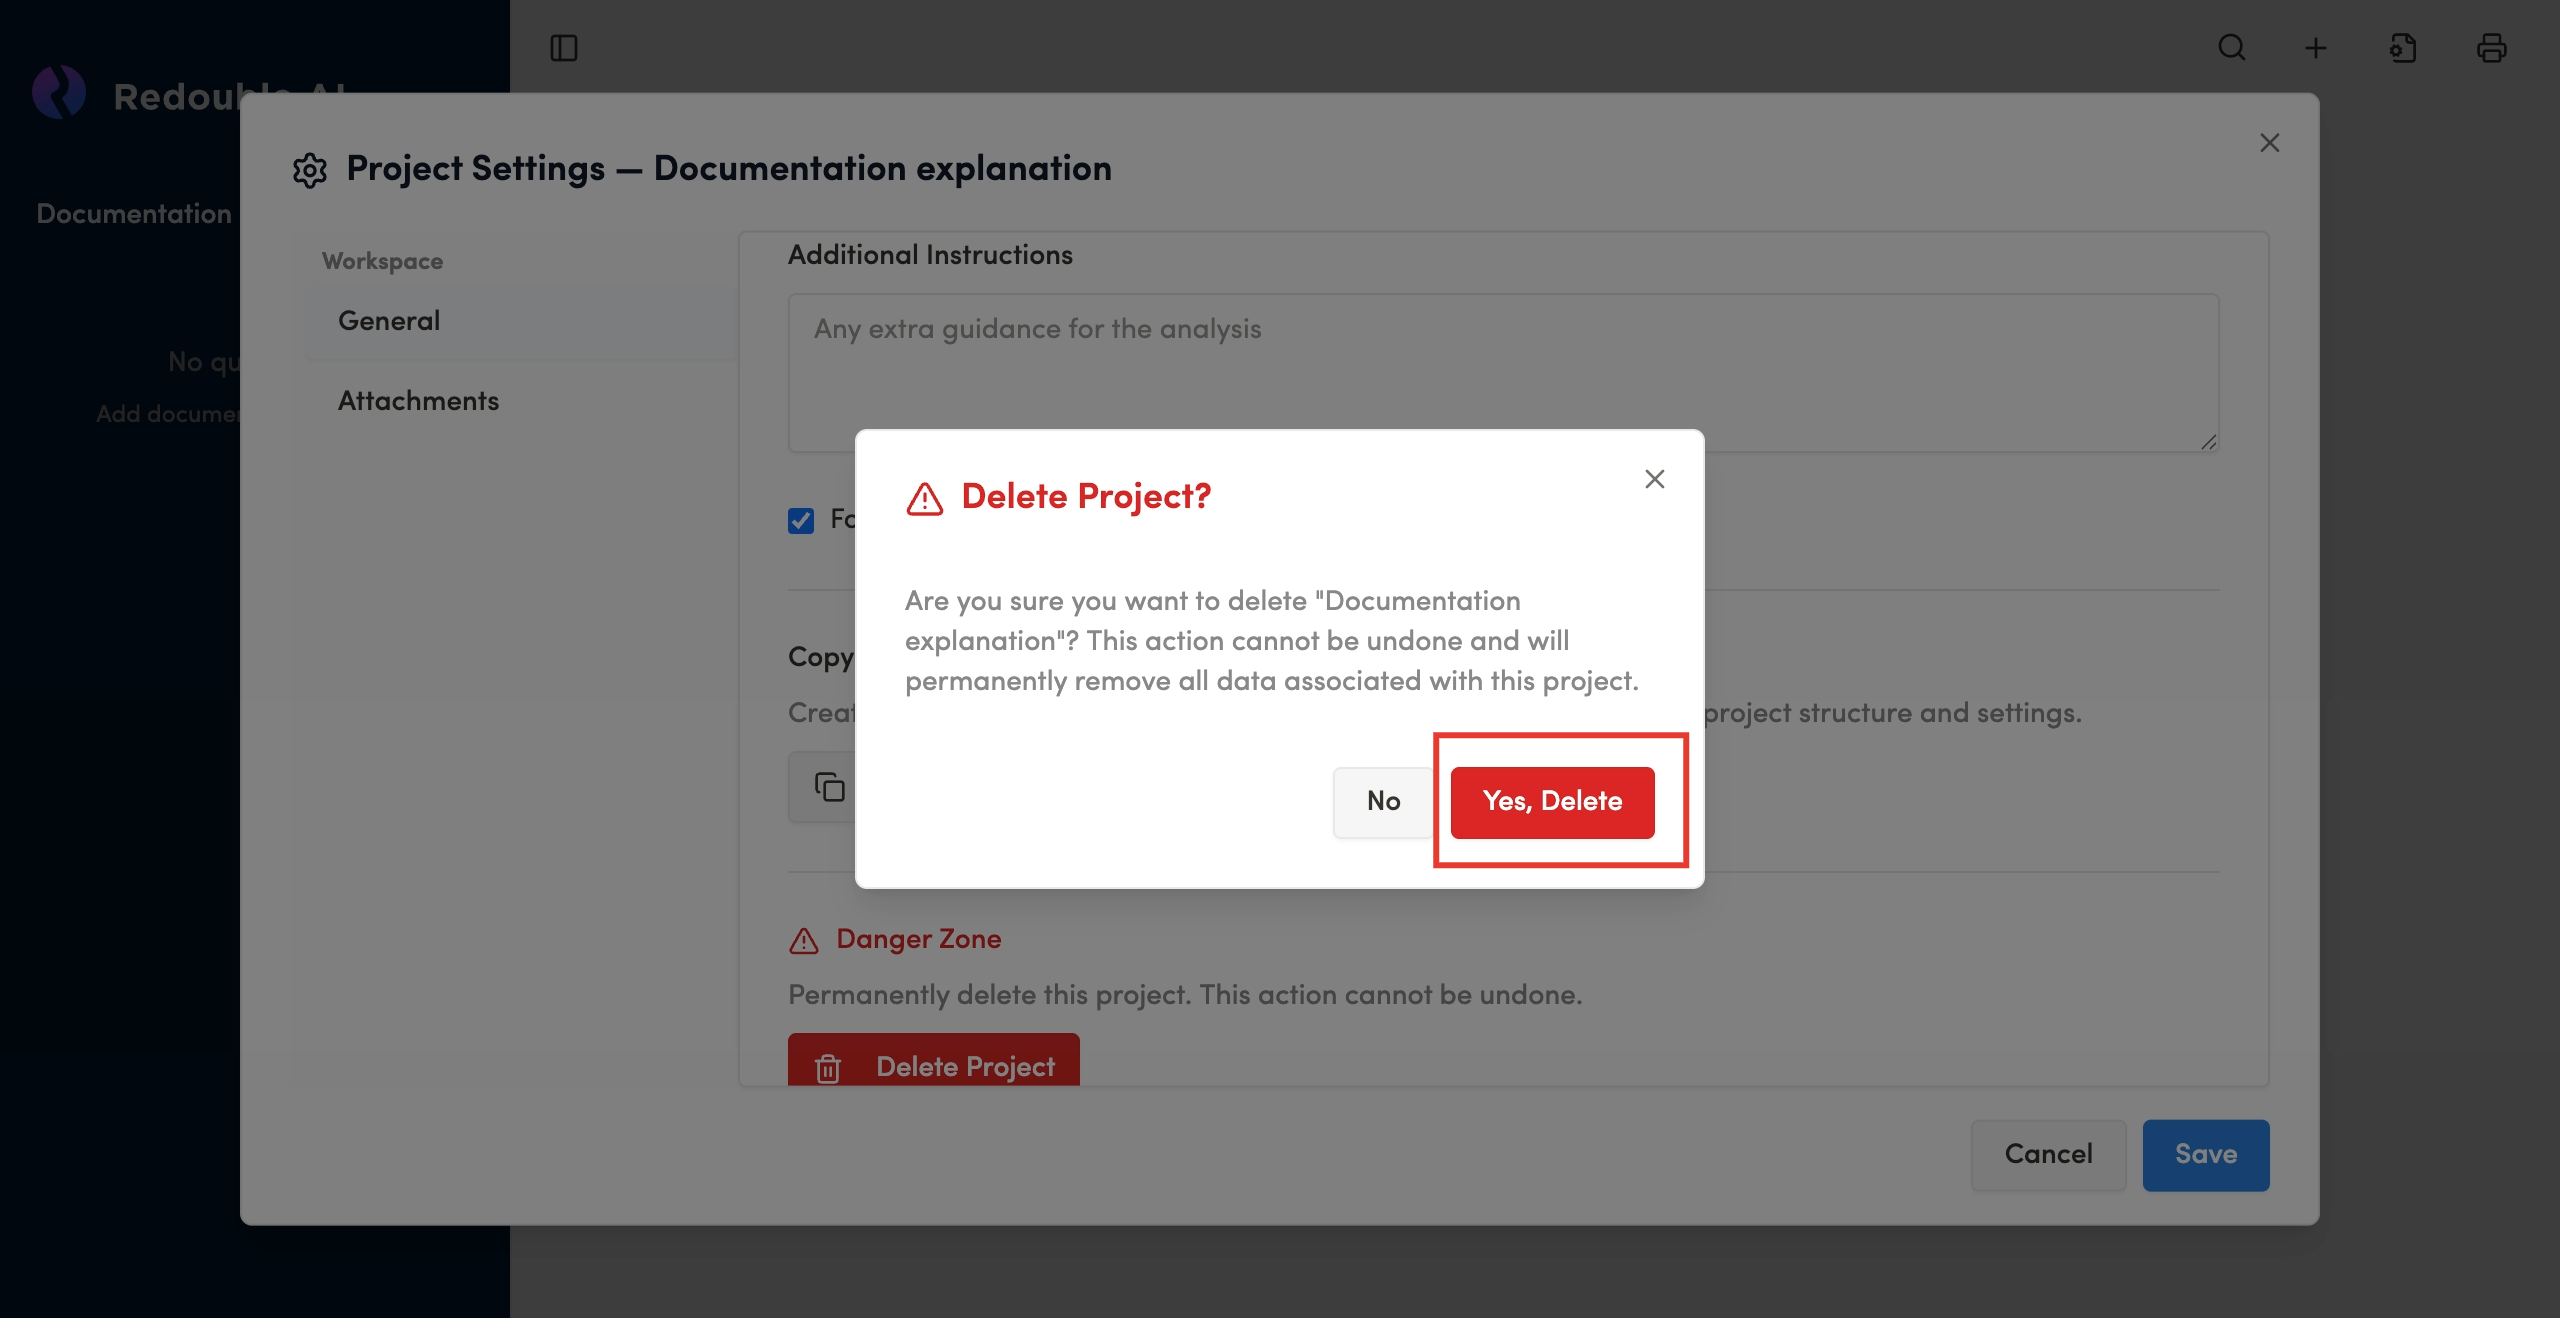
Result: The project has been deleted.
1.6 Copying a project
Purpose: Create a new project using an existing project as a template, copying the project structure and settings without duplicating input documents or answers.
Steps:
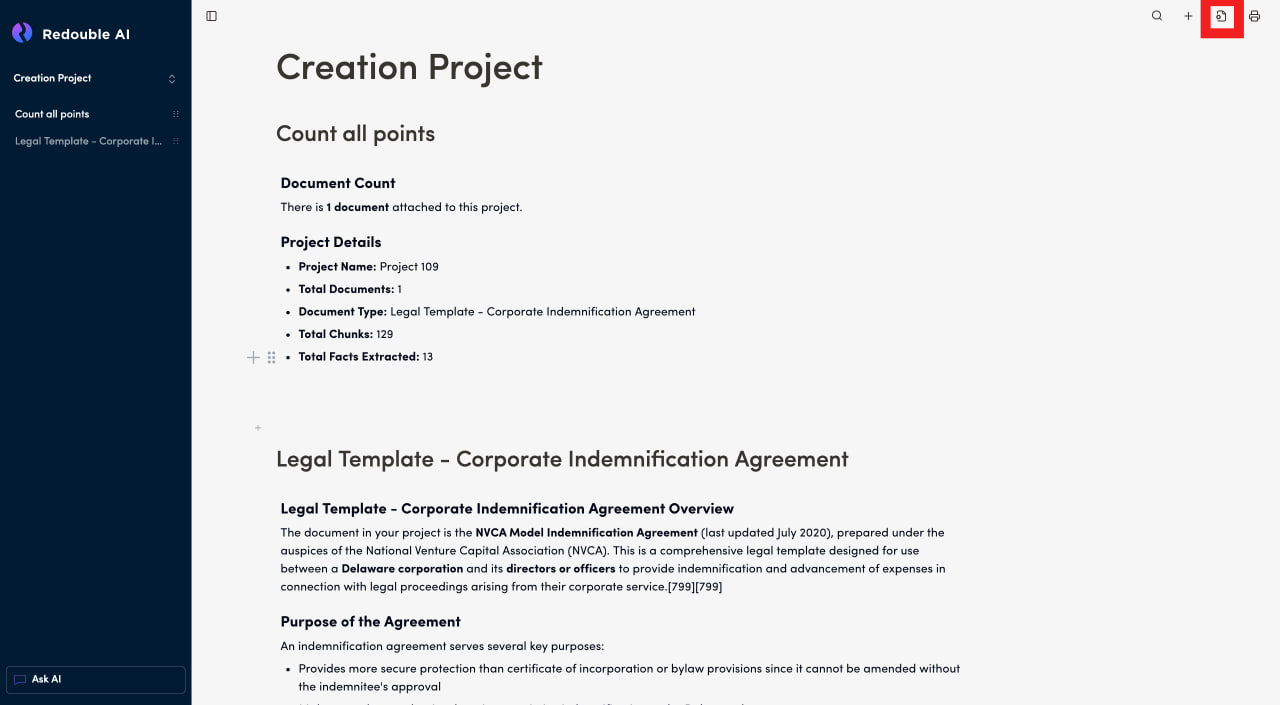
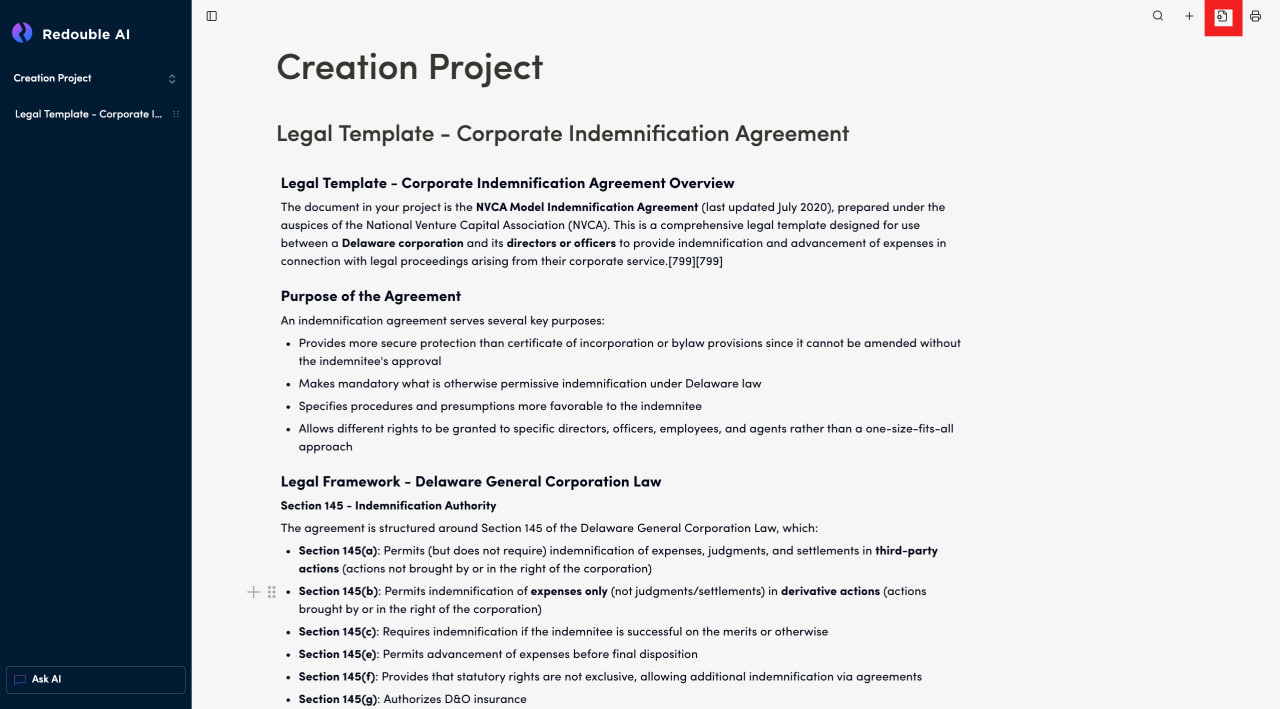
- Click on the "Document Settings" icon in the top toolbar
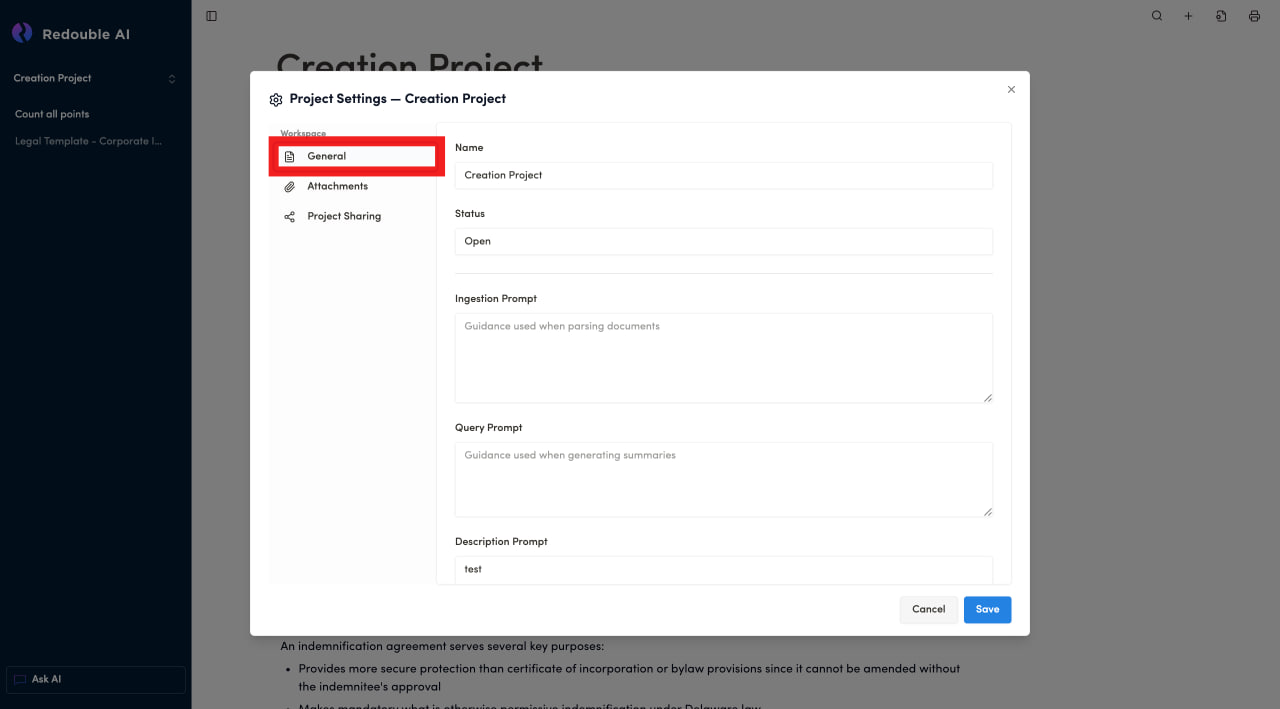
- In the dialog window, select "General" in the "Workspace" list and scroll down to the "Copy Project" section
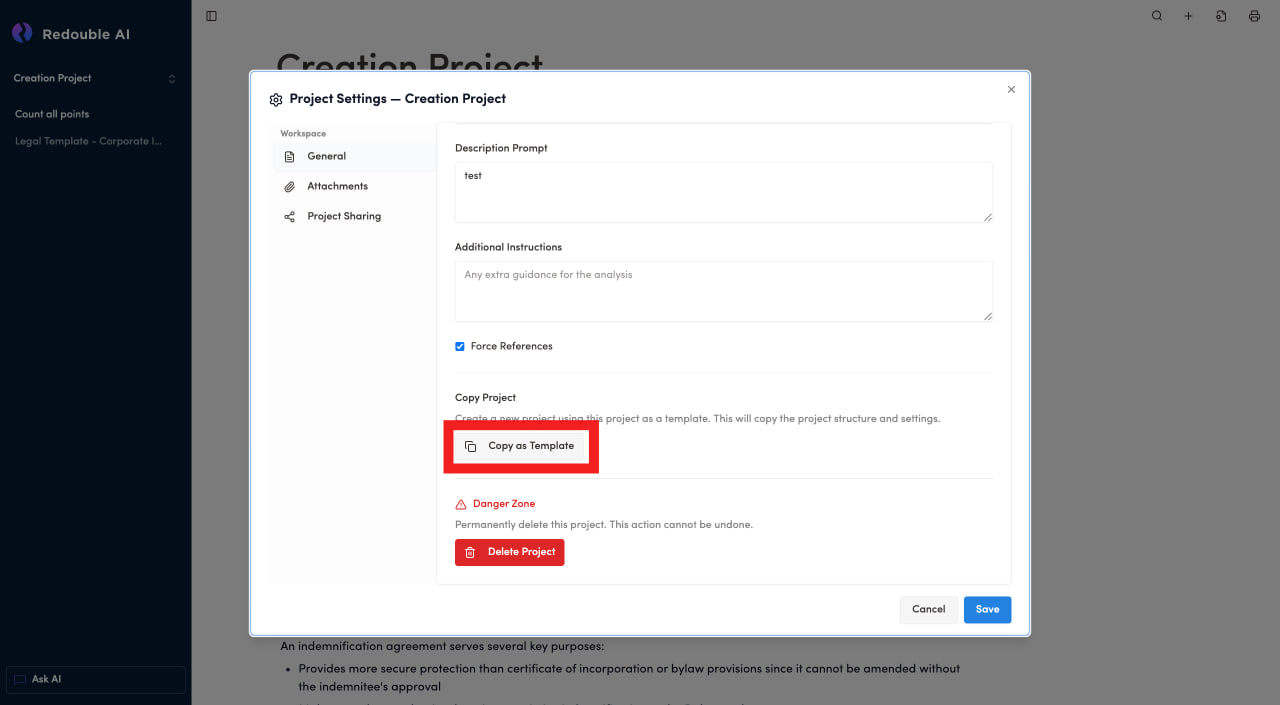
- Click the "Copy as Template" button
- Confirm that you want to copy the project in the popup
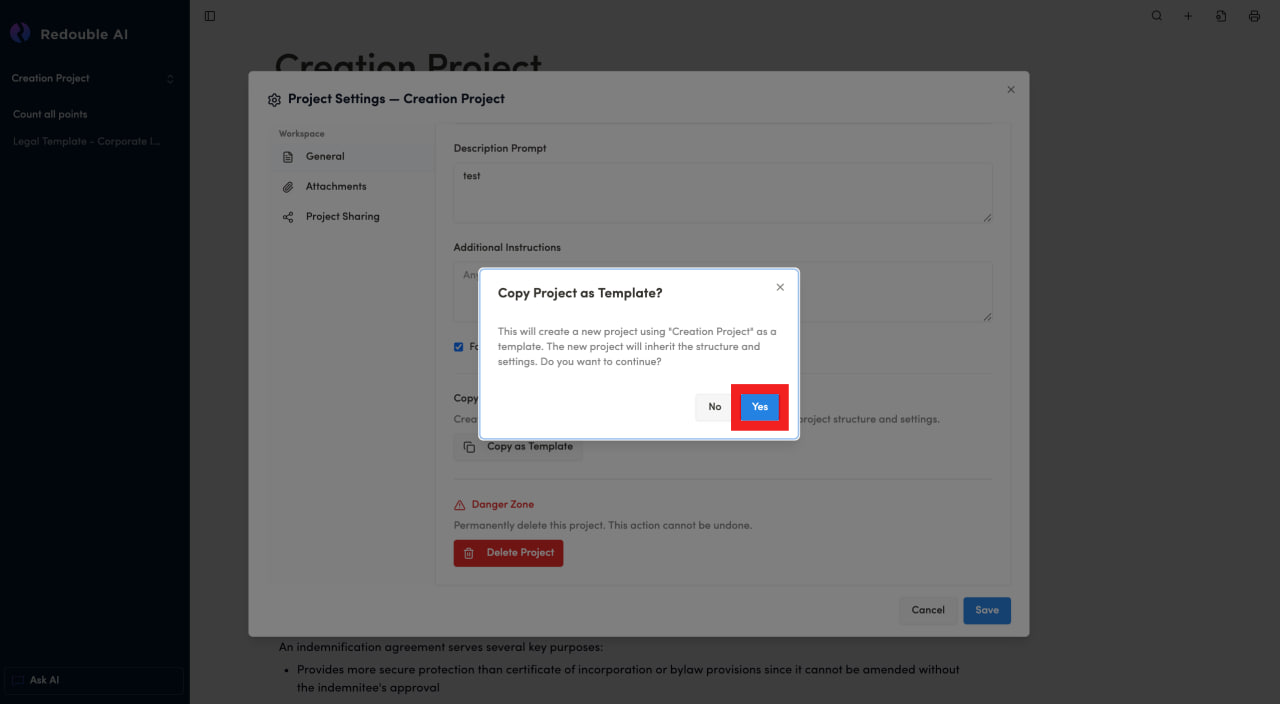
Result: The copy of the project will appear at the bottom of the dropdown list of all projects.
What is being copied
When you copy a project as a template, the following elements are duplicated:
- Ingestion Prompt
- Query Prompt
- Description Prompt
- Additional Instructions
- Force References Setting
- Prompt Templates
What is NOT being copied:
- Documents: Attachments are not copied
- Answers: Existing answers to any questions are not duplicated
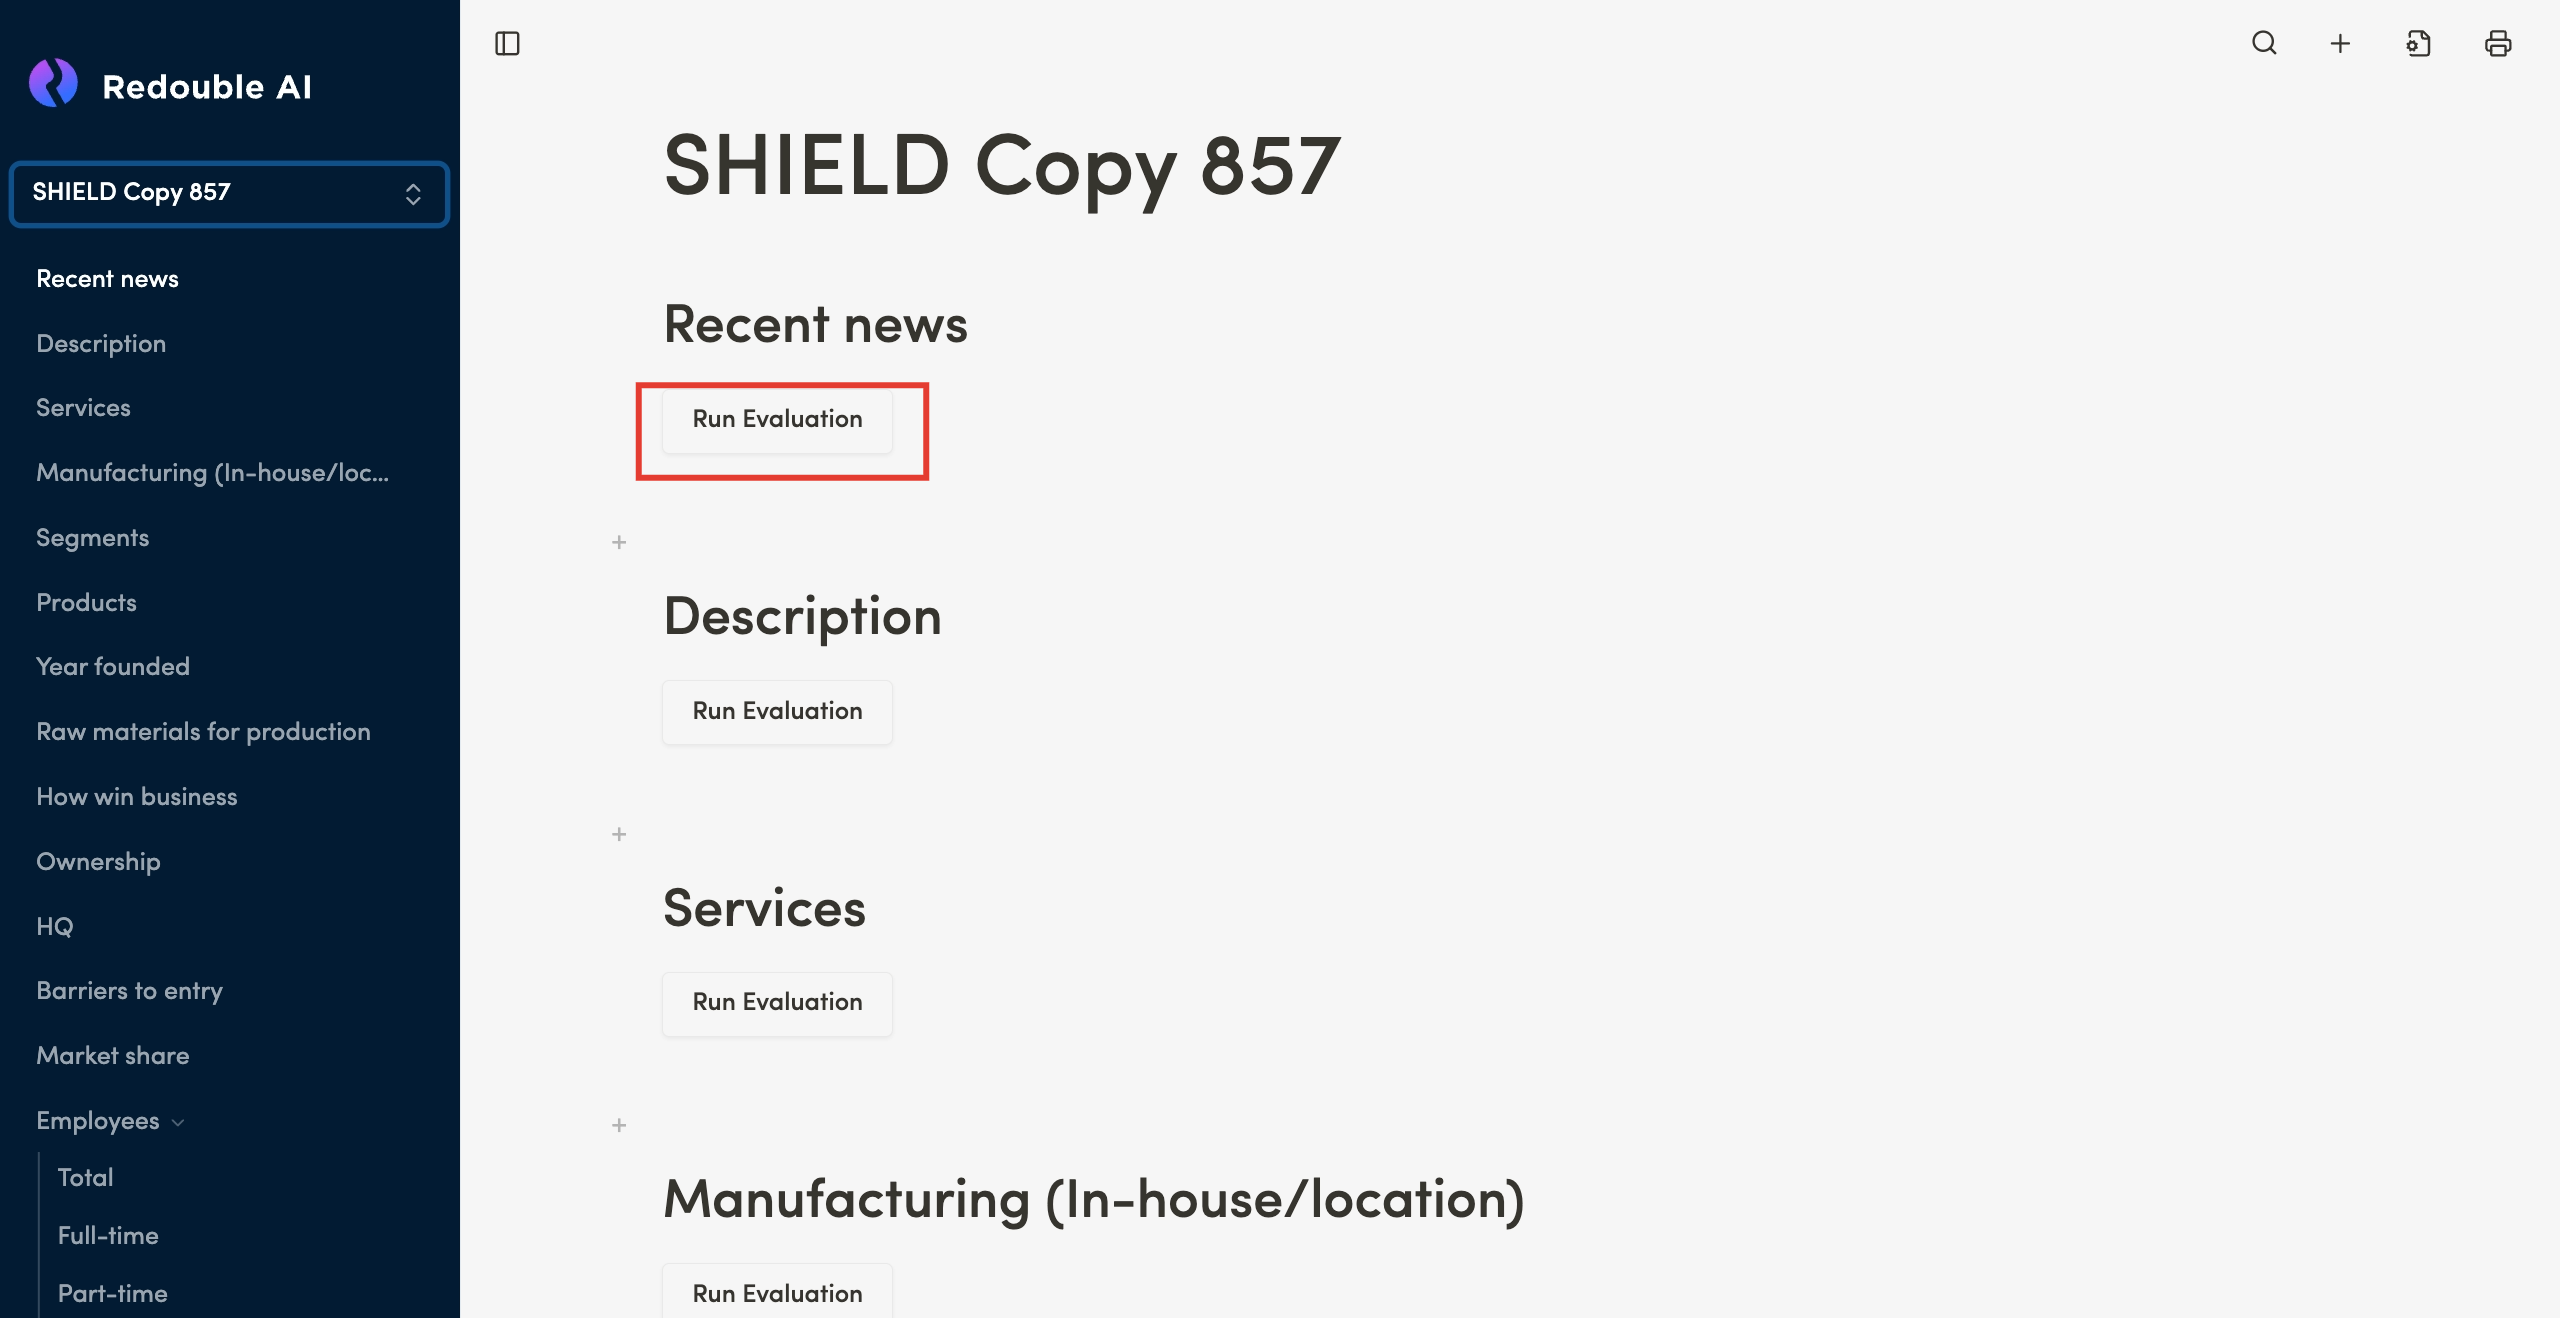
If you want to generate an answer in the copied project, you have to:
- Scroll to the desired question
- Click on the "Run Evaluation" button
1.7 Sharing a project
Steps:
- Click on the "Document Settings" icon in the top toolbar

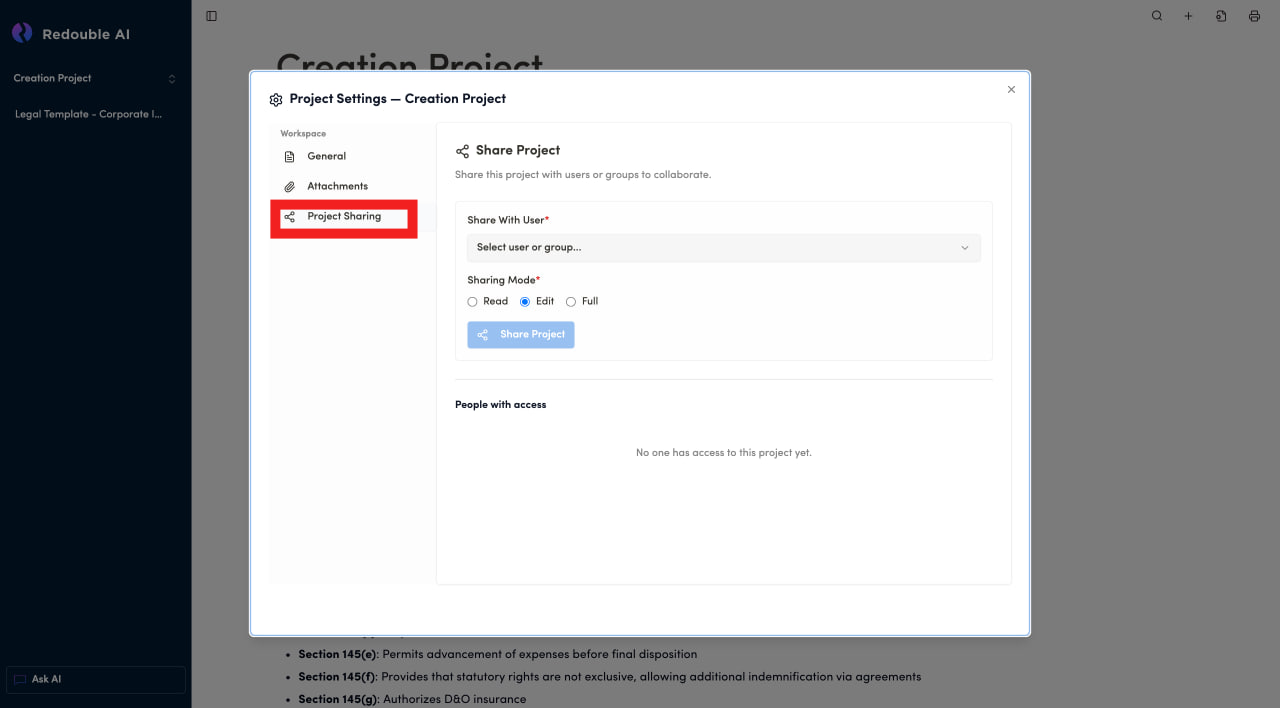
- In the dialog window, select "Project sharing" in the "Workspace" list

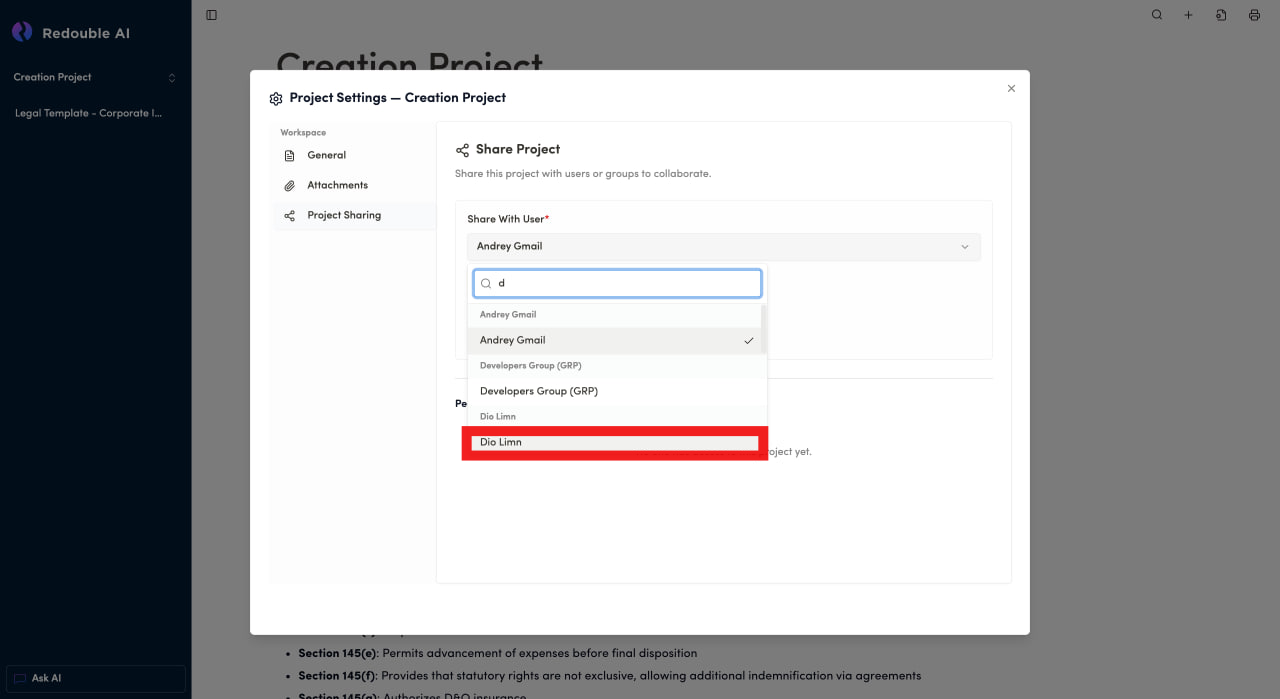
- Click on the "Select user or group" dropdown
- Type name of user to share project with
- Select user from the list

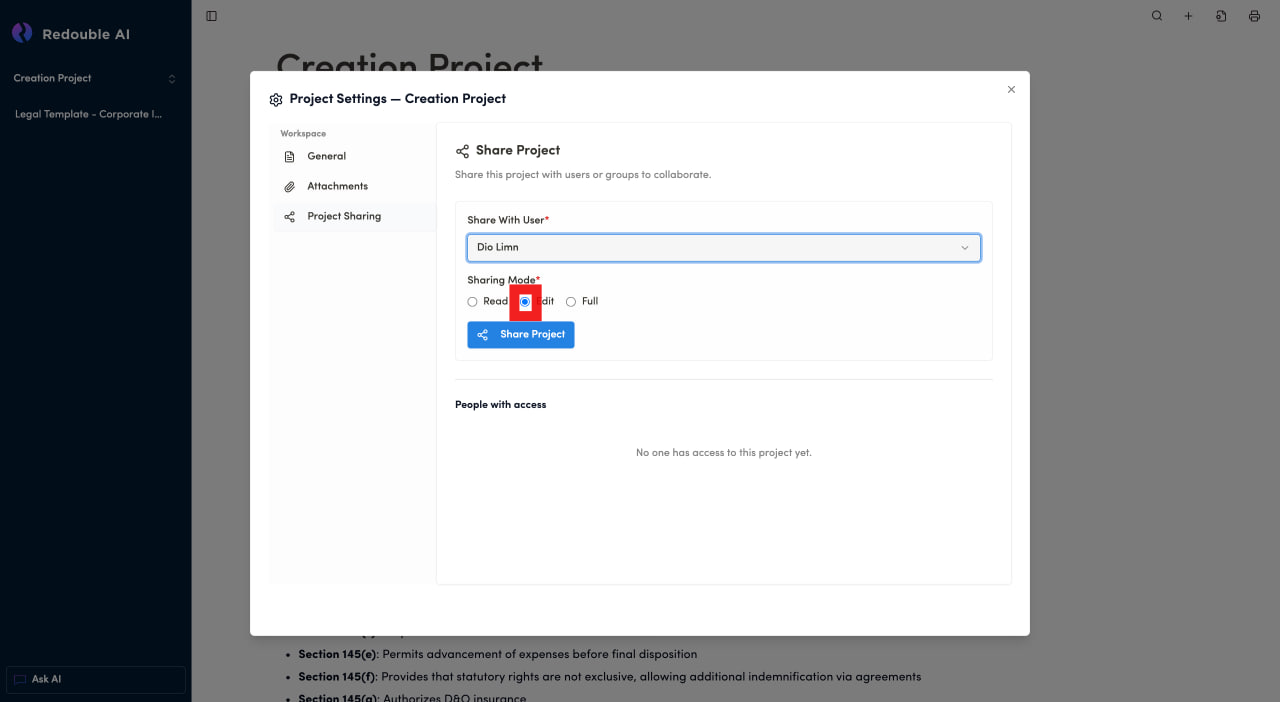
- Select Sharing Mode

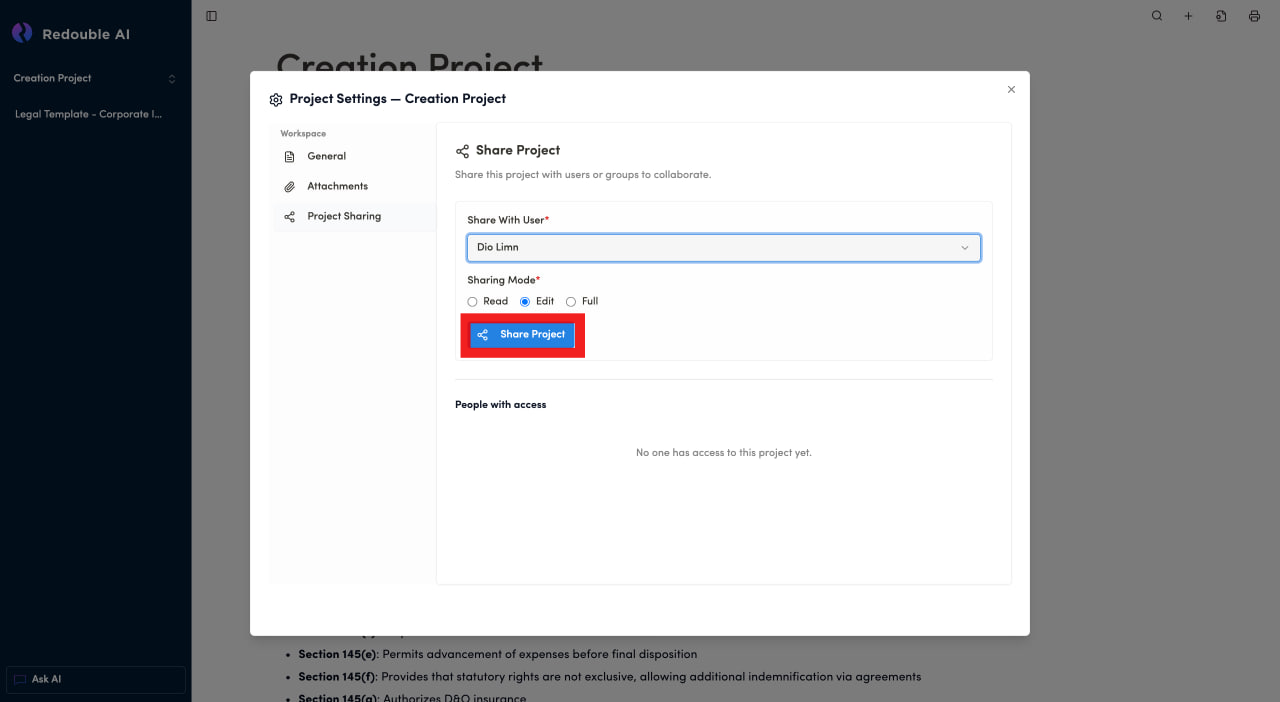
- Click "Share Project"

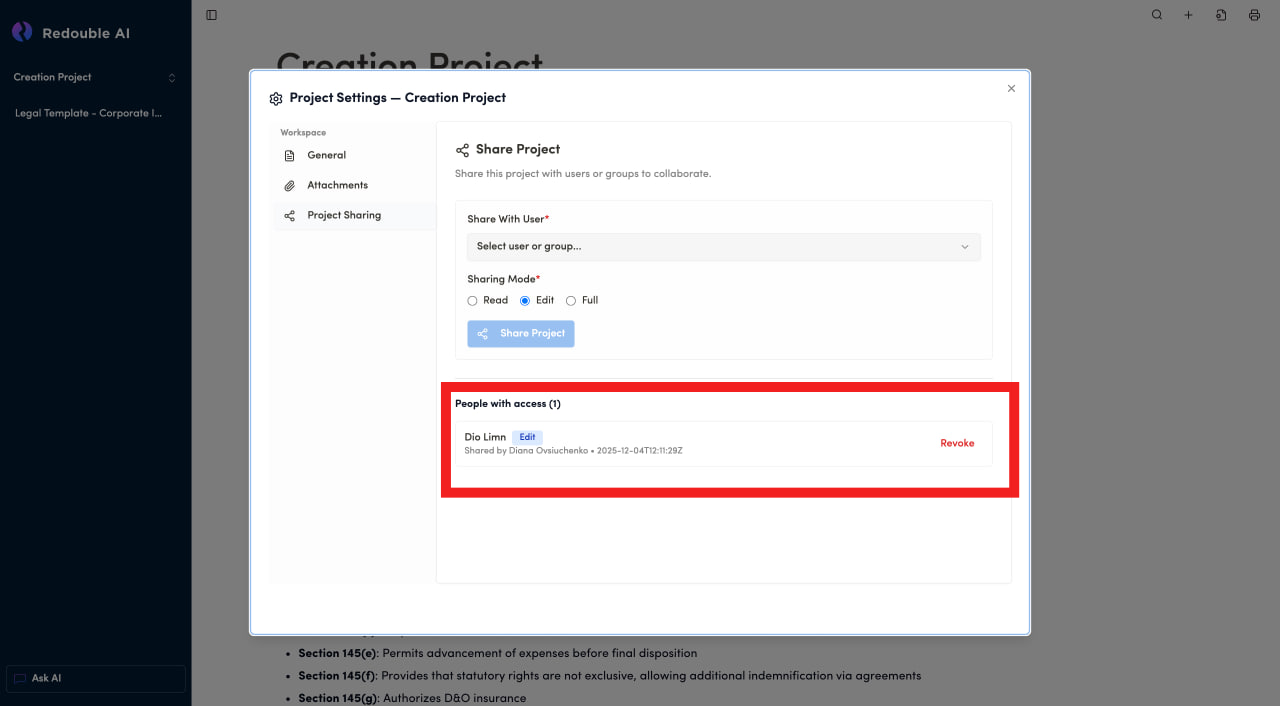
- See the user added to the "People with access" list.

If you want to remove the access to the project, you have to:
- Find the user you want to remove access from in the "People with access" list
- Press "Revoke" button

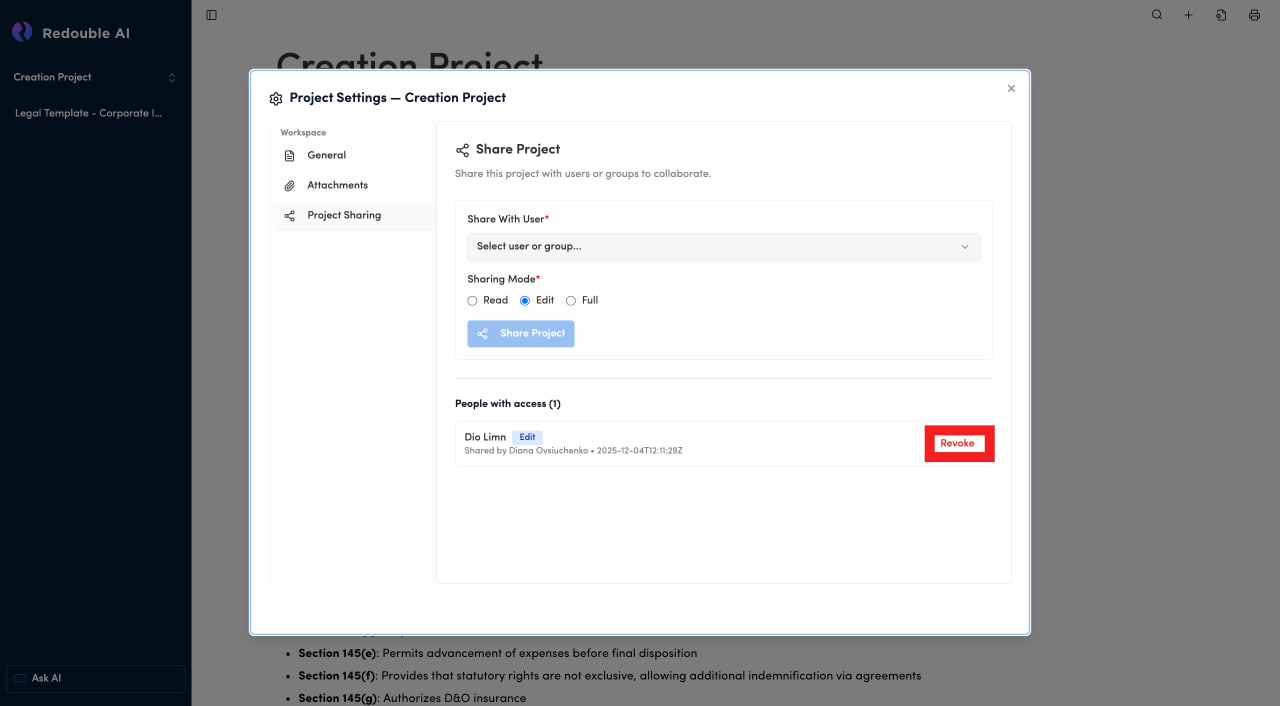
For more detailed information about components on the page, please view 3.3 Project Sharing